
COMPLETED 12.23.11

Jump to…

The Focke Wulf Fw 190A-3
Honestly, what can I say about the Fw 190. If you’re reading this blog, chances are you have at least a passing familiarity with the famed Wurger. If you don’t, know this – small, light and powerful, a study in economy of design. When the Fw 190 first appeared in the summer of 1941, it completely outclassed the RAF’s Spitfire Mk.V, and helped the Luftwaffe maintain air superiority until the very end of 1942, when the Spitfire Mk.IX brought relative parity to the proceedings. Even then, it remained an effective aircraft, and numerous upgrades kept it more than competitive.
Ultimately, it was the high-altitude bombing campaign that taxed the Fw 190A to the limit, as its performance at altitude did not lend it well to the role of bomber interceptor. That would eventually chance with the introduction of the Jumo-powered Fw 190D later in the war, but that’s for another kit.
The Fw 190’s design had significant impact on future allied aircraft as well, and is said to have greatly influenced the development of both the Hawker Fury and the Grumman F8F Bearcat.
The Tamiya Kit
In my experience, Tamiya’s 1/48 aircraft fall into two categories. Some – the P-47, Mosquito, Storch and Swordfish come to mind – take you down a road of many parts and a complicated, if satisfying, build process. Others – the P-51, Bf 109, and Spitfire Mk.Vb – are models of simplicity and engineering. Spread across two or three main sprues, with limited parts counts, they still offer solid detail and go together extremely well.
The Fw 190A-3 definitely falls into the latter category, with parts spread across three solid and one clear sprue:
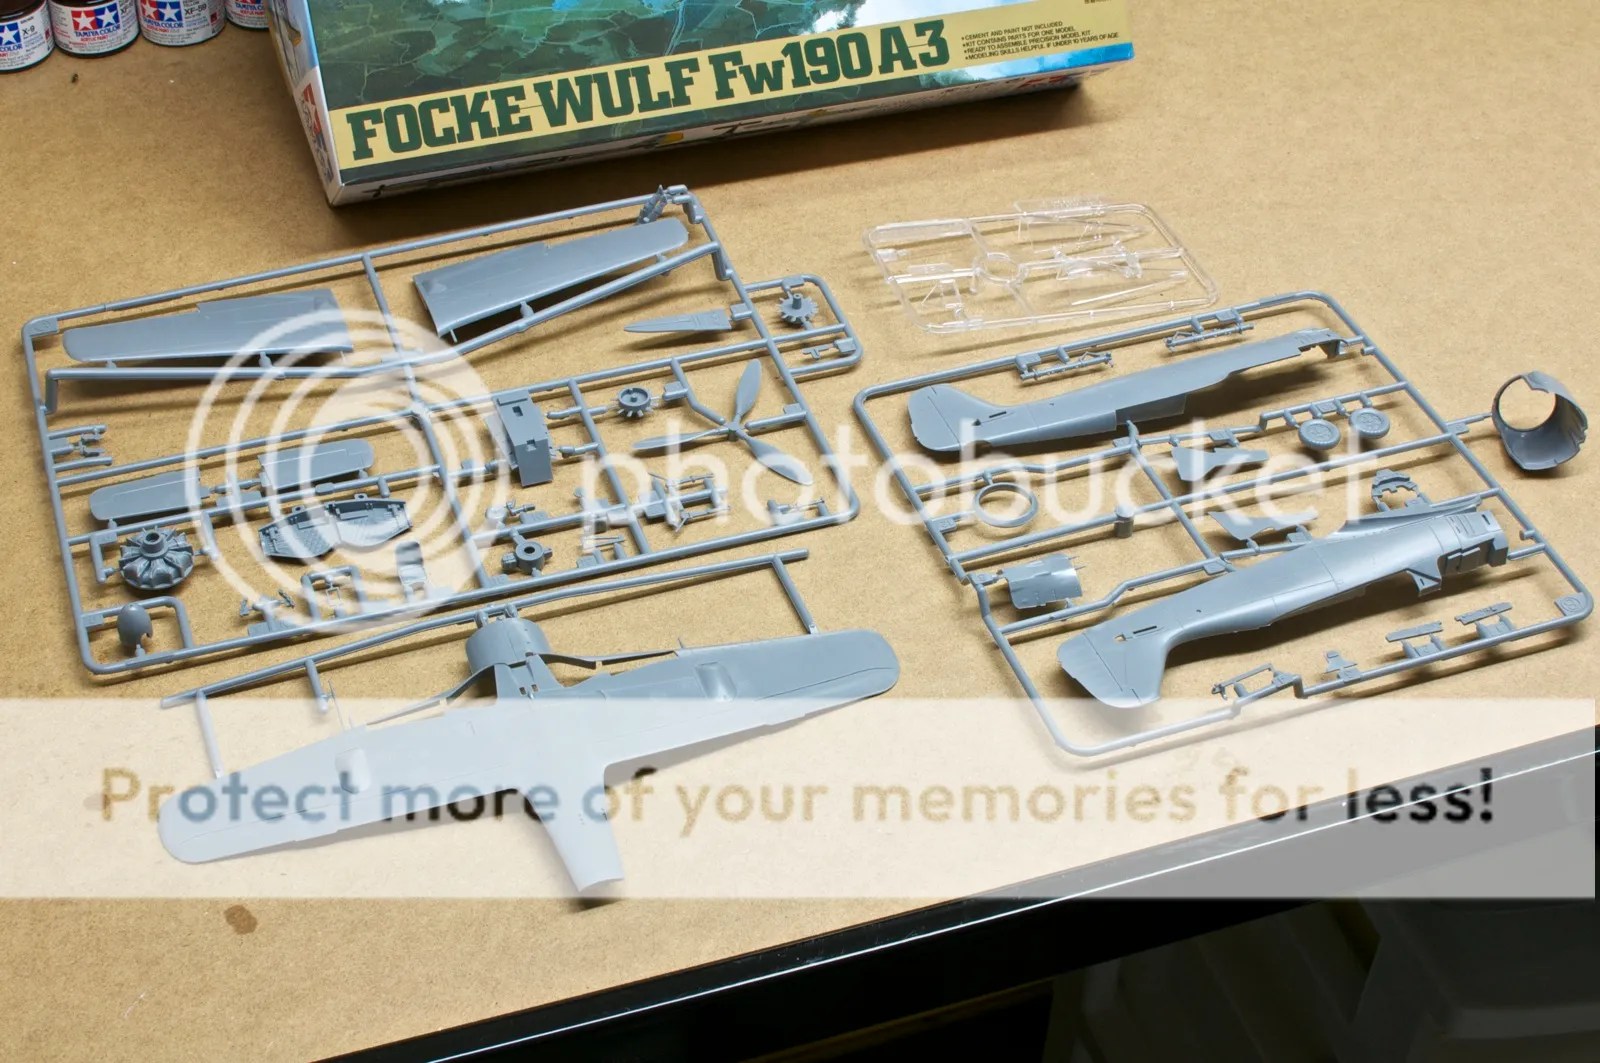
Detail is typical Tamiya – crisp and restrained.

Why the Fw 190?
After two or so months away from the bench, I figure a nice, simple kit like this is the perfect thing to get me back into the saddle before I tackle the considerably more epic 1/32 Trumpeter F4F-3 Wildcat. It’s as simple as that.
The Cockpit – 11.26.11
I’m always shocked at the cramped quarters found within the cockpits of Luftwaffe fighters. Next to their allied – and especially American – opponents, they seem like they were designed for midgets! This is a big part of the reason why I believe German aircraft are better suited to 1/32 scale…but I’m building this Focke Wulf in 1/48, so let’s get on with it.
The Tamiya cockpit isn’t particularly great, but it isn’t awful, either. And since most of the cockpit will be all but invisible once it goes into the fuselage, it’s not really a big deal one way or the other.

After priming all the necessary pieces with Model Master enamel primer, I sprayed the cockpit parts with Vallejo Model Air Dark Grey Green, which is their RLM 66 equivalent. This went on quite well and looks the part.
Once the base coat dried, I picked out details as necessary, then drybrushed it all with Model Master Dunkelgrau to bring out the highlights and add some slight wear. Seatbelts were stolen from an Eduard PE set for Hasegawa’s Fw 190A-8 (I figure I can just replace them with Eduard’s Luftwaffe Seatbelts PE set).
The instrument faces were painted with black, then drybrushed (very carefully!) with white. These were then dotted with Alclad Gloss Klear Kote to give the impression of glass faces.
Lastly, I applied a wash of burnt umber artist oil.


Admittedly, this is very much a fly-through. I don’t feel that there’s enough to this cockpit, or enough visible, to warrant really going all out.
Main Assembly – 11.27.11
The simplicity of Tamiya’s kit really shines through in the main assembly phase. Everything goes together well and quickly – I literally went from nothing to assembled airframe in about two hours.
A few things to watch out for:
– Tamiya asks you to drill out holes in the wing leading edges to accomodate the various gun and pitot tube protrusions. I found it far easier to use my Dremel and the smallest grinding/cutting bit I could dig out. Once the holes were opened up, the wings fit together very well.
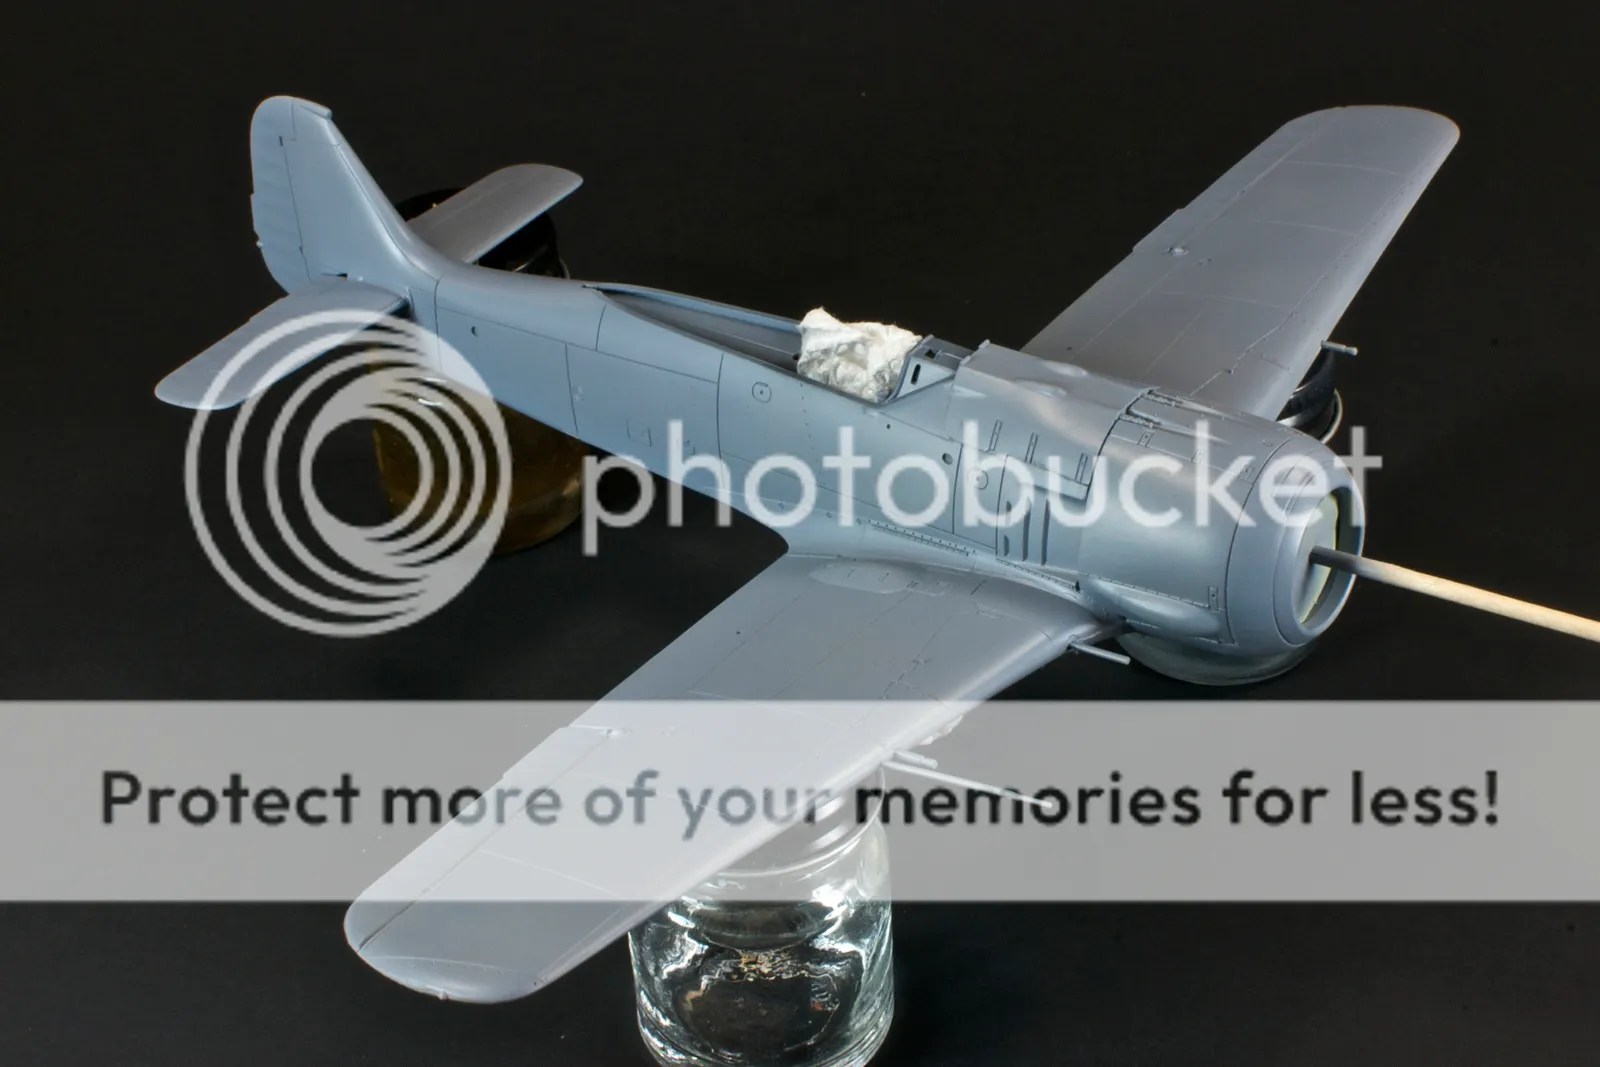
– The wing-to-fuselage join can be a bit rocky, especially at the wing root. If you were to go with the typical approach of gluing the wings together, then sliding the whole assembly under the fuselage, you’d end up with some not-insubstantial gaps. Instead, tape the wings together, then focus on the upper wingroot join first, and work your way around.
And here we are after main assembly.


Prep Time – 12.1.11
The span between main assembly and actually hurling paint at a kit is far and away my least favorite part of just about any build. Sanding, filling, masking, priming. Ugh. It’s enough to make me want to slam my hand in a car door.
Oh…wait.

While stupidity and thoughtlessness – not some frustration at wielding sanding sticks – were the real culprits, I did manage to close my thumb in the car door on Sunday night. This has resulted in swelling, pain, a general inability to grip things, and expletives.
Lots of expletives.
The effective loss of a hand has introduced a new layer of complexity to bench time. For example…masking. Tough to do with only one hand capable of really gripping anything. But I muddled through.
Cleanup was actually rather straightforward on the Fw 190. The Tamiya kit goes together like legos, and I found that I didn’t need to use any filler anywhere…just had to sand seams smooth.
Masking the canopy was an exercise in pain due to my thumb, but an Eduard mask made the process go pretty quick. The cockpit and gear bay were masked off with some damp paper towel.
Then I came to the cowl. Needing to mask off the BMW radial but not the inner lip of the cowl and armor ring, I used a circle cutter to cut a circle of Post-It note slightly larger than the cowl opening. A toothpick was rammed through the center and into the crankshaft where the prop will mount, and the Post-It circle was fed into the cowl, using another toothpick to push the edges inside.

After a quick wipedown with isopropyl alcohol to remove any fingerprints and sanding dust from the surface, I broke out my Harder & Steenbeck Evolution and loaded it up with Model Master enamel primer. I’ve played with several primers from Tamiya, Gunze, Alclad and Vallejo, and to be honest I find Model Master to be probably my favorite of the lot, or at least neck-and-neck with Gunze Mr. Surfacer 1200.
The primer went down without incident, though it did reveal one or two spots that need some additional sanding work. I’ll be taking care of those, and spraying white to back the yellow rudder and undercowl, then moving on to the main paint scheme!
Painting – 12.4.11
Painting kicked off with the yellow rudder and cowl underside. For these, I used Gunze Mr. Color White as a base, then RLM 04 Gelb.

No yellow airbrushes well, but the Gunze goes on better than most. Though I have to admit I’m a bit worried – when masking the yellow ahead of painting the rest of the plane, a whole chunk lifted right off the armor ring on the cowl. So…I may be respraying.
With the yellow out of the way and masked off, I moved on to the underside/side color – RLM 76 Lichtblau. For this I’m using the Model Master enamel of the same name. I’m following my favored three-layer blend technique to give some depth to the paint and bring out the highlights and shadows of the 190’s structure.


12.8.11 – The RLM 76 was followed by RLM 75, grauviolet, on the upper surfaces. Since the RLM 75 shares the upper surfaces with RLM 74 graugrun, I left areas unpainted since, why bother?
To protect against overspray and help me maintain a straight line across the fuselage, I used the same strips of tracing paper technique that worked so well on the Spitfire VIII. By making a mask, then cutting away all but the last 1/4″ or so and taping that in place on the “non-paint” side, the tracing paper flaps under airflow, creating a tight, but soft, edge. I never took a picture of the Spitfire masking, but here it is as applied to the Fw 190A-3:

The RLM 75 was applied with the three-layer blend just like the 76 (though I think less deftly executed).


12.9.11 – Whew. Painting the Fw 190 is certainly an exercise in layering! Paint the RLM 04 rudder and lower cowl. Mask. Paint the RLM 76. Mask. Paint the RLM 75. Mask.
Yeah.
Last night I completed the last phase of the “mask-and-paint” process, the RLM 74 graugrun (gray green).
Masks were made by tracing the to-scale painting guide Tamiya includes with the kit, carefully cutting out the RLM 75 patches, cutting slits in them to facilitate masking, and aligning them on the kit.
The slits provide a way for tape to hold the masks to the kit surface, while allowing the edges to lift a bit and flap under flow from the airbrush, creating a tight, but still slightly soft, edge.
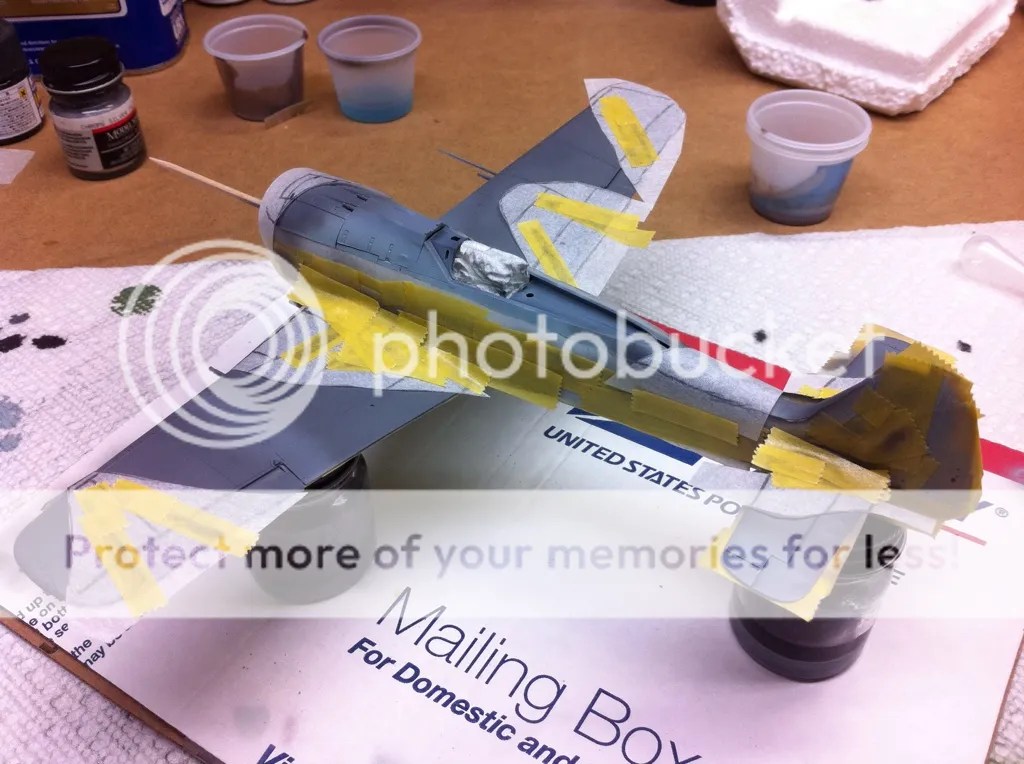
The RLM 74 was applied in similar fashion to the 76 and 75, using the triple-layer blend technique. I must confess, I got a bit lazy with the photography, and only snapped a quick photo after the lightened graugrun had been sprayed.

After the blending coats were applied, I picked the 190 up by the tail and pulled away most of the masking. I’d de-tacked all the tape before applying, so for the most part it pulled away easily, though there are some thin strips up near the lower cowl as well as the tail masking that still need to be removed.

12.10.11 – Thankfully, fears of paint lift brought on by the armor ring incident were overblown -when I finished unmasking the lower cowl and rudder, the Gunze RLM 04 stayed in place perfectly!
From there it was on to mottling the fuselage sides. This was done with RLM 74 and 75 run through my Iwata HP-C+.

Honestly, I’m only half happy with it. I think I needed to thin the paint back more, but Model Master just doesn’t do fine lines when you reduce it like that. At least, it doesn’t for me. I think my next mottle-job will be done with Tamiya or Gunze paints.
Markings – 12.14.11
After some quick masking and painting of the 190’s red trim tabs, I shot it with Tamiya TS-13 clear gloss and then did something stupid.
I used the kit decals.
I’ve used Tamiya decals in the past, almost always to my regret. On my first build back to the hobby, Tamiya’s otherwise-excellent P-51B Mustang, I encountered the three suck points of Tamiya decals, which have carried through to every single build I’ve used them on, in part or in full. The exception being the sheet included with their 9th Air Force P-51D boxing, which includes an infinitely superior Cartograf-printed sheet that I stole for all national insignia and stencils on “Petie 2nd”.
Anyway, those three suck points:
- Thickness – Tamiya decals are extra-super-thick, which poses all kinds of problems. First, they just don’t suck down into contours and details very well. You have to do a lot of work to get them to melt into a panel line or settle down over raised details. They’re also relatively solvent-proof, and even the nuclear option of the decal world – Solvaset – only has moderate effect on them. The thickness also makes it difficult to hide the carrier film.
- Silvering – I believe this may be a side effect of their thickness, but Tamiya decals silver at a far higher rate than any other decals I’ve used. They silver on surfaces where I know very well that other decals don’t, as I’ve used them to complement aftermarket markings on a few kits. I think the thickness means they don’t settle down fast, which means those small gaps between the paint and decal that lead to silvering. Other decals overcome this by not sucking.
- Adhesion – Some decals just suck down to the surface the instant they make contact. Tamiya decals are the opposite. On the 190, I had crosses and stencils shuffling around on me hours after applying them. Even dabbing them with paper towels and cotton swabs fails to fix this, and often as not causes them to shift slightly out of proper alignment.
As much as I hate Tamiya decals and have now vowed to never use them again (until the next time I use them…sigh), they actually came out mostly pretty well:


Still, dreaded adhesion problems struck on the port side wing walk lines when I was applying Solvaset to them, resulting in a nice, big fail that ensures all final shots will be of the starboard side.

Weathering – 12.21.11
After the decals set up, I sealed them with a coat of Tamiya Clear Gloss. Patches of a few decals on the port side went all brittle and flaked away where they never did quite suck down over complicated surface details. One more reminder of why I will never entrust a build to Tamiya decals again, I guess.
With the decals sealed, I slathered the 190 with some Flory (formerly ProModeller) Dark Dirt wash. I used this stuff on my Spitfire and Mustang builds, and it’s become a favorite of mine for bringing out surface details and panel lines.

After the wash dries, it’s wiped away with a damp cloth or towel – in this instance I used those blue paper towel-like shop towels you can get at any automotive or hardware store. The Flory was is clay-based, and comes up easily even when dry.
Once the wash was wiped off, the propeller and landing gear were fitted. The landing gear proved frustrating due to the angle the wheels need to set at relative to the gear struts. They actually need to cant about 15-20 degrees, but the mounting pins try to force them parallel. I got around this by not seating them entirely and giving the Gator’s Grip glue time to set up.


12.23.11 – With the wash cleared off and the landing gear mounted, the rest of the build went pretty quickly. I sealed the wash with a coat of Alclad II Light Sheen to match the, um, light sheen that most Luftwaffe aircraft exhibited. On top of that I added some light chipping with a silver Prismacolor pencil, exhaust staining with MIG Black Smoke pigment, and wingtip nav lights done in my usual Model Master Chrome Silver with Tamiya clears on top. In addition, the guns were treated with MIG Gunmetal powder, and the tires were weathered with some MIG Russian Earth.
The canopy proved to be something of a pain. There’s a discrepancy in the angles of the windscreen and canopy hood that create a misalignment if you try to display the canopy closed. Boo! In my opinion, the 190 looks pretty much perfect all buttoned up. As a result, I had to display the canopy opened, which meant I also had to slacken the the aerial wire connected to the tail (which was designed to go taut as the canopy’s pulled shut. I used the Uni-Mono monofilament I use for biplane rigging, but it did a terrible job of sagging the way you’d expect. Hmm.
Well, without further adieu, here’s the finished 190A-3.


All in all, a pleasurable build that took me a pretty short 28 days (tied with Tamiya’s Mosquito for second-fastest build), but with a few areas I’d definitely improve upon if tackling it again (decals, gear struts, gun detail). Thanks for following along and stay tuned for further adventures in styrene and harsh chemicals!

Can’t wait……..
What’s up with the quarter scale? I’ll follow this though as I have this kit.
Scott – I figured a nice simple build would be a good idea before I bust into that big Wildcat! That and I need to thin the 1/48 stash herd a bit…
So far it looks great Doogs! Thanks for the play by play. I have this same kit in my stash and may give it a whirl once I have my latest, a BAE Systems Hawk, off the bench… especially looking forward to your approach to the paint scheme because Luftwaffe camo is one of my favorite things to mess around with.
Enjoying the build log, Doogs. And, frankly, you’re blog is my favorite by far. Keep it up.
One note: I’m getting a “blank” image (one that’s not loading) below the first image and above the Jump to… header. Looking at the HTML, it looks like you have the image file assigned to the “class” rather than the “src” of the image tag.
Thanks Robert – hopefully I’ve got the image thing fixed now?
It’s still messed up. It’s fine on your other build logs (BTW, I love the new format) but the Fw 190A-3 causes problems.
Bob
Doogs, the image problem does appear fixed now.
In regards to your thumb…. (did it myself a few years ago), if you haven’t done so already, the easiest way to relieve the pressure under the nail is to literally drill a very small hole through the thumbnail! Sounds crazy, I know. My wife, who was a nurse for 18 years told me the same thing when I had my mishap. Instead, I went to the Doctor hoping for pain meds. What did he do? Why, he drilled a hole through the nail! But the relief from the massively throbbing pain was immediate!
Keep up the great work, I am really enjoying your blog!
Mathias
Monterey, CA
Mathias – I wish! Doc told me I came in too long after and all he’d hit would be dried blood. Wouldn’t relieve much pressure and would just invite infection. But now I’m on hydrocodone, so at least there’s that…
It’s looking good Doogs! I myself have wondered about the problem of lifting paint when masking. Just recently had the same issue with a Bf109 and not only tore up the paint but also destroyed some decals! I was thinking about shooting a layer of Future between colours next time and seeing how well it works…
Hey guys
Re: the yellow lifting off… i had that happen once and now anything that needs masking i just spray a *very* light coat of Future over the area to be masked and let it cure for 48 hours. The Future seems to “hold together” better than the actual paint and resist lifting. try it next time.
cheers
andy
So how accurate is this kit to the real thing, and what is the kit’s model number?