
Over my past several builds, I’ve become increasingly disenchanted with my cockpits. Despite the usual weathering, they’ve all appeared too…clean.


So, with my current set of builds, I’ve determined to see if I can’t add some depth and variation from the get-go. There’s still a lot more I can do to add visual interest to the cockpits – busying them up with wiring and such – but this how-to is going to focus exclusively on laying down a base coat that, on its own, provides an added layer of depth and variation.
1. Paint it all black
Rather than spraying your main color over gray styrene or gray primer, lay down a black base coat first. For this B-25 I used Tamiya X-1 Gloss Black since I also had some Alclad to shoot, but you can use any black base, be it gloss, flat, or semi-gloss. Hell, bust out the satin if you’re feeling saucy.

2. Base coat that bastard
For this to work, I like my paint like I like my excuses – extremely thin, random and haphazard. Tamiya and Gunze paints work brilliantly, and Model Master enamels can hold up well, too*, but I would stay away from paints that don’t reduce well, such as Vallejo.
Spray with a light, tight spray pattern and slowly build up the color. Don’t try to cover all the black, though, since that’s your source of shading and depth.
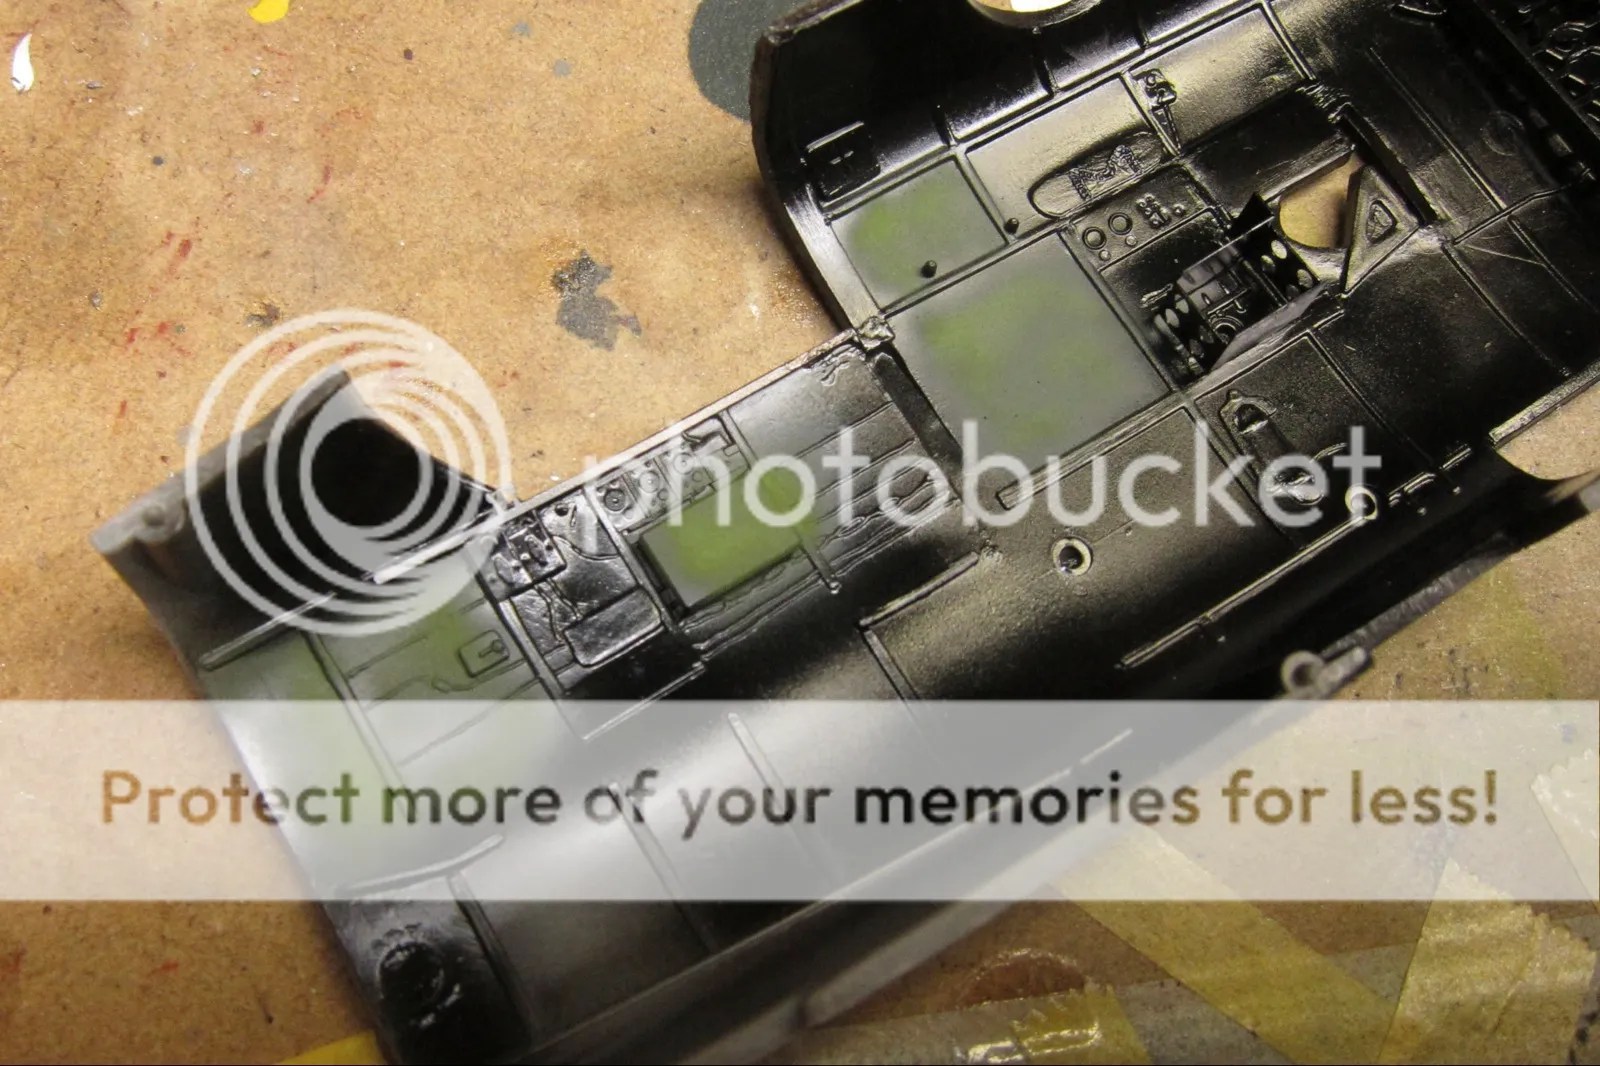
Here we are midway through the process:
And done. Here’s the B-25 cockpit floor and seats:

…the P-51B cockpit floor…

…and the Dewoitine D.520 cockpit…

From this point, there’s obviously still a lot of work to be done to bring the cockpit home, but the added depth and shading offer a much better foundation to build from.
Try it for yourself and let me know how it works in the comments!
*Heavily-thinned Model Master enamels can tend to get a bit run-happy. You can tame them down a bit by adding some hotter lacquer thinner to the enamel thinner.

I usually start by giving a coat of black, spraying at an angle from the bottom. Then I spray the color coat at an angle from the top. This creates deeper artificial shadows easily without the having to spray each area between the framing. Besides, on 1/48, it’s often too small for me to control the spray just inside the framing anyway. I follow by a wash of brown/black oil to deepen the shadows more. Finally, I rub silver artist pencil along the edges. Then I go add weathering as needed.
Like it Matt, i will be trying this for sure, good stuff 🙂
That looks really good. I’ll try this on my next project (some RAF Mosquito, I think).
So how would this method work with a German cockpit in RLM 66?
I don’t see why not – wouldn’t be all that far off from the Tamiya XF-24 I used on the D.520…
I just tried it using Tamiya Nato Black and MM RLM 66 and then some Vallejo Blanco to lighten the RLM. Works like a charm. Thanks for the tip!
Nice! It’s one awesome little technique isn’t it? Thinking about rolling it out for airframe work too…
Just finished stage one of painting Cockpits the Doogs models way.
i used Revell aqua color semi gloss black together with Revell aqua color thinner. (this is a 2 in 1 thinner, it thins and it retards.) Now its time for some RLM 65….
Doog, I just tried this on my Gripen cockpit and it looks amazing so far. Nice and subtle I used Tamiya Acrylics for my job.
Cheers
Jonathan