
UPDATED – AUGUST 2018
This is a post I’ve been meaning to write for a long time. After all, airbrushing is probably my favorite single aspect of modeling. And, with all the airbrushing talk that’s been swirling about the interwebs lately, it seems like the time is right.
So what is this? It’s a deep – I hesitate to say exhaustive – dive into many, many facets of airbrushing, from airbrush selection to paint selection to mixing paints to spray discipline.
Here are some in-post links if you want to skip ahead:
- I – Choose Your Weapon
- II – On Selecting Primers
- III – Paints
- IV – Thinner and Air Pressure
- V – How to Airbrush
Part I: Choose Your Weapon
A – Do I even need an airbrush?
In my opinion, yes. It’s possible to limp along in this hobby with paintbrushes and rattlecans, and even thrive in certain genres like figures, but the atomization, precision, and layering capabilities of an airbrush simply cannot be matched by other means.
B – I’m just going to buy a cheap knockoff. High-end airbrushes aren’t worth the money.
Uh, hold on there, chief.
Think of airbrushing like driving, and airbrushes like cars.
If all you’re doing is driving to and from work each day in traffic, you’re not pushing the performance envelope of any car at all. You can get by just fine in any random shitbox. The same goes for airbrushing. If you’re going to setup at standoff distance and just hit a model with a single color of paint, yeah, pretty much any airbrush will do. A nicer airbrush is kinda like a nicer car. It’s a hell of a lot more pleasant to sit in traffic in a Mercedes than an early 90s Kia, but nothing about the drive will really change.

The difference comes with specialty work.
To keep the driving analogy going, let’s pretend that broad work – laying down primers and clear coats for example – is the equivalent of hauling a trailer. And fine, detailed work is like carving corners on a winding country road.
An early 90s Kia is going to suck ass at either of those specialized tasks. For towing, you’d want a truck with the power and gearing to haul the appropriate load. For cornering, you’d want something small and nimble with a finely tuned suspension and excellent steering feel.

If you’re learning or seeking out something of a more general purpose airbrush, a knockoff will probably work just fine. But as you start to push against its performance limitations, that’s when you want to consider investing in something higher end.
C – Type of Airbrushes
If you’re new to airbrushing, sorting out all the terminology of airbrushes can be kinda confusing. What’s the difference between single and double action, internal and external mix, blah blah?
How Airbrushes Work – Let’s cover this base first. Maybe you don’t care how airbrushes do their thing. Personally, I’ve always found that knowing how a thing does what it does, being able to picture that action in my head, gives me a better sense of what’s going on, and therefore better control.
You have two basic elements at play in any airbrush. The first is air, supplied via compressor, tank or can at a higher than atmospheric pressure. The second is fluid, usually paint, that you want to spray.
Now, airbrushes don’t actually blow paint. They pull paint into the airstream by using something called the Venturi Effect. You can look up all the exact science for yourself, but basically, when you direct pressurized airflow over a nozzle, the pressure differential pulls the paint into the airstream, where it is atomized and transported to whatever you are pointing the airbrush at.

Internal vs. External Mix – Refers to where the air and paint mix. Internal mix airbrushes combine the two inside the body (though at the extreme tip only), forcing air to flow past the nozzle and pulling paint with it, as explained above. External mix brings the two together outside of the body. Externals are generally clunkier, but can still be good for broad work. The most common example is the Paasche H.

Single vs. Double Action – Refers to what happens when you use the airbrush’s trigger. With a single action, the trigger unleashes airflow, and that’s it. You have to use a separate control to regulate the paint flow. With a double action, pushing down on the trigger opens up the airflow, and pulling back on it pulls the needle back to allow more paint to flow through the nozzle. It sounds complicated, but it’s second nature once you get the hang of it.
Gravity vs. Side vs. Siphon Feed – Refers to where the paint comes from. Gravity feed airbrushes have a cup that sits on top of the body. Paint enters the needle channel thanks to gravity. Side and siphon-feeds plug in from the side (dur) or the bottom and paint is sucked into the needle channel because physics.
What do I prefer?
Internal mix. Double action. Gravity feed.
D – My Airbrush Lineup
I’ll be the first to admit that I’m a total airbrush whore. I’ve got several. And I’ve sold several more. Unlike cars, it’s nearly impossible to “test drive” an airbrush. Ones I don’t like I’ll turn around and sell as used – lose a bit of money in the process, but not as much as you’d think.
Anyway, here’s my current preferred roster. Note though – I very much prefer painting small, even on larger kits, so what I consider a workhorse, others may consider a detail brush.
Broad (for clear coats, primer, etc):
Iwata Revolution CR-M2 – A nice, compact single action airbrush that can spray pretty fine, but opens up for a nice, broad pattern. It’s also very easy to clean because of its simple design.

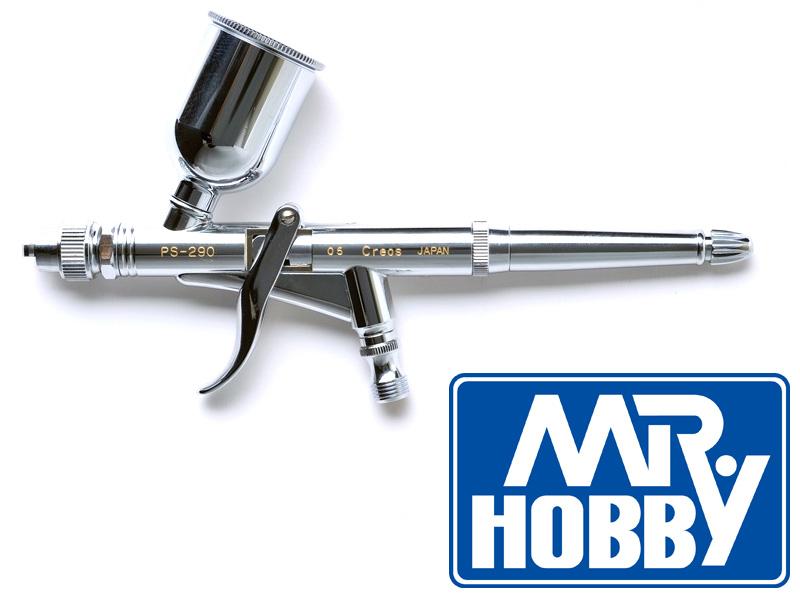
GSI Procon Boy PS-290 – the PS-290 is a trigger-action airbrush, and the Gunze version of the Iwata HP-TH. It features a 0.5mm needle/nozzle and comes with a fan tip that, honestly, I don’t use all that often. The PS-290 is a monster at atomization, and can cover a lot of ground very fast, making it great for primer and for clears that require you to lay them down wet, like Gunze GX100. The gigantic color cup is a bit annoying, however, and the more rigorous breakdown and cleaning process keep me from using this one for anything but lacquers, which are easily flushed out.
General Purpose
Iwata HP-C Plus – This airbrush is great at the middle range – from pretty fine detail to more than broad enough for my purposes of applying paint. I’ve swapped in the 0.2mm needle/nozzle combo from other airbrushes in the High Performance Plus line.

Fine Detail
Iwata Custom Micron CM-B – I managed to score my CM-B used off of eBay, and if you can do the same I highly recommend it. Before you try a Custom Micron, you think “how good can these things really be?” And then you try one. They’re exceptionally pricey new, and so if you’re in the market, I’d recommend considering the PS-770 right below, but either way, the 0.18mm needled precision airbrush is my go-to for most of my paintwork, with the exception of blend coats, primers and clears, and metallics.

GSI PS-770 – Gunze airbrushes have a lot of shared DNA, including interchangeable parts, with Iwata. And the PS-770 is Gunze’s take on the fearsome Custom Micron. The spray head and needle are interchangeable and the spray performance is, at least to my perception, identical. But the PS-770 is about half the price. SEE MY PS-770 REVIEW.

E – What else do you need?
An airbrush is the obvious step one in getting an airbrush, but what else do you need to make it work?
- Air source – Most people go with a compressor, but if you have convenient access to a welding or gas supply store, you might also consider getting a CO2 tank. Just don’t go for those compressed air cans – they’re expensive as shit and have incosistent airflow.
- Regulator – A regulator controls the air pressure coming from your air source into your airbrush. Get one that has a lot of precision from the 0-40 psi range.
- Moisture Trap – Duh. Moisture and airbrushing is a bad combo.
- Braided Hose – Just get one. They’re tough and they don’t get tangled up.
- Quick Connect – If you run more than one airbrush, you want to invest in these. They make swapping brushes a two second task.
- Ventilation – Don’t airbrush in a closet. Even with acrylics. Breathing in atomized paint is bad. I spray in my garage, and have a setup that keeps me upwind of anything coming out of the airbrush. Others have cool spray booths with exhaust fans.
- Respirator – Again, breathing in atomized paint is bad. Get a respirator. I’ll admit I don’t use mine all the time – when I’m spraying small I’m throwing so little paint around that I’m sure plenty of other things will kill me first. But for primers and clears and metalizers and other things that call for more paint flow, definitely a good idea to have one around.
Part II – On Selecting Primer
A – Why Prime?
I highly recommend priming for several reasons. First, to give yourself a uniform canvas from which to build your paint scheme – no junk like different colored putty and so on peeking through. Second, a good primer will etch into the plastic, giving paint much better adhesion than going over bare plastic. Third, in reverse, a good primer will protect the plastic from hotter paints than can craze and otherwise deteriorate polystyrene.
There are plenty of people who don’t prime and they’re pretty set in their ways. But I would highly recommend it.
B – Good Primers
Not all primers are created equal.
Some – Vallejo’s primers, Alclad’s gloss black base, and Model Master Acryl primer all come to mind – have proven unreliable enough that I would anti-recommend them.
Then you have a swath that I would call decent. Such as Model Master Enamel Primer (as long as it sticks around). Most rattlecan primers I’d also throw into this category. Not because they are bad, but because the rattlecan format is massively overkill for what we’re doing, and can very easily flood the surface of a kit and bury detail. Decanting is an option, but if you have non-rattlecan choices that are as good or better, why?
Acrylic primers I generally do not recommend, because they don’t etch into the plastic the way a good enamel or lacquer primer will.
So what do I consider good primers?
Gunze Mr. Finishing Surfacer 1500 – Typically just shortened to MS1500, this is Gunze’s “finest” primer, and is available in both gray and black. It doesn’t have as much body as their other Mr. Surfacer products, and it’s not going to do as good a job filling scratches, but if you’re priming on a well-prepped surface, this stuff is as close to perfection as it gets. It takes masking and sanding very well, and can be polished if called for. It also resists scratches, scuffs and scrubbing.
Overall, I’d say I use MS1500 for about 80% of my priming. Though there is a chance that might be changing.

Badger Stynylrez (also available from UMP as Ultimate Primer, and Ammo as OneShot Primer) – Stupid, stupid name, but the only acrylic primer that I’ve ever used that I would use again on purpose. It sprays like absolute shit, and looks like absolute shit as it hits the surface, but over about ten minutes, something amazing happens. It levels out to a perfectly smooth finish. It’s important to give it at least 24 hours to really set, but after that, it’s more or less as impervious to paint as lacquer primers. Note though – it has a weird tendency to attract dust (I think it might be a static charge thing), and it’s susceptible to scratches.

Another benefit of Stynylrez is that it comes in a wonderful bounty of colors, so you aren’t bound to either black of gray. While I still prefer priming in black for aircraft, the ability to use brown or green or mix my own shade of primer has proven useful for armor builds, where black-basing isn’t as relevant.

Tamiya AS-12 Bare Metal Silver – A primer in all but name, this metallic doesn’t really look like bare metal silver. It’s closer to aluminum lacquer paint and therefore great for Mustang wings, postwar RAF aircraft and so on. It’s only available in rattlecan, which is annoying, but when it’s decanted it sprays wonderfully and is tough as nails. It’s especially useful as a primer on something that will be getting heavily chipped.

It should be noted that there are currently two contenders to AS-12’s pride of place as a metallic primer.
First there’s Tamiya’s new Lacquer Painto line, and LP-11 Silver in particular. I recently used it on a tiny 1/144 MiG-15UTI, and came away impressed. Though I did not get to put it through enough paces to determine if it’s as bombproof as AS-12.
Second, there’s a new line of lacquer primers (well, newly-easy-to-buy-in-the-US) that includes a silver flavor. I have yet to try them, but hope to soon.
Gunze Mr. Surfacer 1000 and 1200 – MS1000 and MS1200 are heavier-bodied primers than MS1500. Useful when you need to cover over some nasty cleanup. Both of these primers may go down with a (very) slight roughness, but a quick pass with a fine grit sanding sponge or piece of micromesh cloth will yield a buttery smooth surface.

This should not be taken as an exhaustive list. There are some primers that are good, but no better than ones mentioned here, and more of a pain to use for certain reasons (like Tamiya Fine Surface Primer).
There are also primers that I have yet to use, but am curious to try. Such as:
Mission Model Paints – Mission’s primers may be another option for acrylic priming that I don’t hate. And their paints are intriguing enough that I might just give it a shot.
GaiaNotes Surfacer Evo – From what I understand, this stuff is Gaia’s take on MS1500 – but it comes in a variety of color options, including black and silver. I’ve got some on order to try, and am excited to do so.
C – When acrylic primers make sense
Never.
Ha! Not really. As much as I love my Mr. Surfacer, there are times where it makes a ton more sense to use an acrylic primer, and by acrylic primer I mean Stynylrez.
Case 1 – Hard to reach areas prone to dusting. Think about, say, the gear bays of an aircraft, or the intricately detailed wheels of a car kit. If your lacquer primer dusts on you in there – which it could, since airflow gets wonky in confined spaces – good luck getting sanding materials in there effectively. In cases like this, Stynylrez is a great alternative.
Case 2 – Kits that use non-styrene parts. Probably the best case here is Meng and their workable tracks. If the tracks are made of styrene, it’s a softer variety, and there are real-world examples of harsher paints like lacquers and enamels degrading them. Again, a good case for using an acrylic primer on these.
Part III – Paints
LOL – paints are such a minefield, especially with the shoddy and confusing labeling so many of them use. Generally, I would consider it a wise choice to not go all in on just one brand of paint – personally I usually bounce between three. Options are good! So is knowing their limitations and what it takes to get them to perform at their best.
A – Types of Paints
Very generally speaking, there are three types of paints – acrylics, enamels, and lacquers. Now, the reality is more complicated. For example, Tamiya’s paints are alcohol-based acrylics, but they thin and spray wonderfully with lacquer thinner.
I don’t think there’s any one perfect paint – each one includes some kind of compromise – but some paints are way better than others.
Enamels – Growing up, Model Master enamels were the shit. I didn’t know of any other paints. Nowadays, I see enamels referenced less and less, though. Probably because they have some drawbacks other types of paints don’t.
Enamels are flexible in that they can be both airbrushed and brush painted. They’re also slow-drying, so useful for drybrushing and various weathering applications.
Unlike water-based acrylics, enamels are toxic and make poor drink mixers. And unlike acrylics and lacquers, enamels can take forever to fully cure. Even for patient builders, waiting a week for your paint to outgas its happy ass is aggravating. Enamels can also pose serious problems come weathering time, since a lot of weathering work tends to involve working with mineral spirits, which will do bad things to an enamel paint job.
One other thing to consider with enamels is that they seem like something of a dying breed, at least as an out-and-out paint. Notably, a massive swath of Testors’ Model Master line was recently discontinued. Given the quality and number of alternatives, there’s really no reason to stick with enamels these days.
Water-Based Acrylics – Paint modeling terminology is even more of a mess than the DC Cinematic Universe, and perhaps nowhere moreso than this category. Water-based acrylics is a bad term, but we need a catch all for these water-thinnable, water-cleanup-able paints that are not mineral spirit, lacquer, or alcohol based. This broad category increasingly features those dropper bottles favored by Vallejo, Ammo, Hataka, AK Interactive and so on. Often they come pre-thinned for airbrushing. A few brands – Lifecolor comes to mind – still use more regular paint pots.
Water-based acrylics generally thin best with their own thinners (but not always). Water can work, but if you’ve ever sprayed water through an airbrush, it has a tendency to spider and suffer from the ravages of surface tension.
Water-based acrylics, like enamels, generally have a limit to how far they can be thinned. This also impacts their ability to truly spray small, since you are often skirting the line where they start to lose their cohesion.
These paints typically have to be built up in layers. Lifecolor I think is the most notorious for this, but far from alone. Lifecolor only likes to go down over other Lifecolor, so your first layer has to be built up gradually, each layer getting more “bite” over the previous. The same holds true for Ammo.
Water-based acrylics don’t bite into preceding layers very well, so they can also be far more prone to tape lift. Not a big deal if you’re doing armor, but an aircraft that requires lots of masking may be asking for trouble.
And of course, water-based acrylics have to contend with the dreaded “tip dry”. Tip dry occurs when the paint literally dries on the needle or in the nozzle as air passes over it. This leads to lots of frustration and expletives, especially because it tends to kick in worst when you are trying to paint small (not enough paint flow to keep things moving). The common solution is to wet the tip with water or thinner on a q-tip or paintbrush, but a more elegant solution is to add some retarder to the paint. It won’t magically fix everything, but it’ll cut down on tip dry to a large extent.
Water-based acrylics are also generally excellent for brushpainting. I keep a stock of Vallejo Model Color around expressly for detail work.
Lacquers and Alcohol-Based Acrylics – I’m lumping these two together as both thin down with lacquer thinner and both have very similar performance characteristics. But I’ll note that you can thin alcohol-based acrylics like Tamiya with water, with UMP thinner, and even with isopropyl alcohol. Just don’t expect it to have the same spray characteristics it does with lacquer thinner.
Okay, let’s get the bad out of the way. Lacquers ain’t great for brushwork. They’re also toxic and generally a bad thing to come into contact with. All the best modeling materials are.
The good? Lacquers spray beautifully. Just beautifully. If all you’re used to is shoving Vallejo (or god forbid some kind of trashy craft paint) out of an airbrush, the first time you try a quality lacquer, you will shit your pants and start crying it’ll be so beautiful. And because lacquer thinner cooks off so quickly, they aren’t as prone to run, and they dry basically as fast as acrylics.
Lacquers can also be thinned to within an inch of their lives. My favorite paint – Mr Paint – already comes thin and ready for the airbrush, but for fine work I’ll bump it a bit more. For Tamiya and Gunze paints, my starting ratio is 2:1 thinner-to-paint, but I’ve pushed it to 80, 90% thinner before and still had things hold together.
This ability to thin so far means that lacquers can be applied in translucent layers, super effective for building up a nice, varied paint finish.
Due to their hotness, lacquers are also good at grabbing surfaces, so tape lift isn’t a huge issue unless there’s some kind of contamination or weakness under them.
I thin my lacquers and alcoholic acrylics with Gunze Mr. Leveling Thinner. It’s mixed at a ratio that slightly prolongs drying time, which helps prevent dusting and allows paints to level a bit on the surface before the thinner evaporates off.
B – Choosing Your Paints
What paint works best for your needs depends on several factors. Selection, availability, and the conditions in which you paint all matter. What you will be doing with the project matters. The type of subject matters.
Personally, my three main go-tos are Mr. Paint, Gunze Mr. Color, and Tamiya. As mentioned above, I love the way all three of these spray and perform, and I feel like I have a level of control with them that isn’t present with other paints.
IV – Thinner and Air Pressure
Okay, so we’ve covered off on airbrushes and paint. Now it’s time to bring them together. But first, we have to get things ready.
A – Thin your fucking paint
Some paint brands come pre-thinned for airbrush use. But what constitutes “thinned” is pretty relative based on what you want to do with the paint. Sometimes – gasp – you may have to thin them further.
Paints like Tamiya, Gunze, Lifecolor and Model Master that come in regular pots will all need to be thinned before spraying.
Thinning makes paint flow better through your airbrush, less likely to clog your airbrush, and eases cleaning at the end of the session. It also lets you reduce the coverage – or opacity – of the paint, so you can build up in layers and be more controlled in how you’re applying shit to your model.
How to thin?
First, get a container. DO NOT THIN OR MIX PAINTS IN YOUR AIRBRUSH. This is lazy and a wrong move can jack shit up. Nothing like having incompatible paint and thinner turning to sludge in your nice airbrush, right? Take the extra thirty seconds and mix in a separate container.
My favorite mixing containers are tattoo ink cups (15mm size). You can find them on eBay for ridiculously cheap, and they’re nice and small so you’re not wasting paint and thinner you’ll never get to use.

Next, get a way to transfer paint to said container. Those silly acrylic dropper bottles have that built in. For other paints, again, to eBay! Buy a fuckton of disposable pipettes and go to town. You can kinda sorta re-use them, but when you can buy them by the thousand…
Okay, so next, you use the pipette to grab a bit of paint. Drop a small amount into one of those ink cups. If we’re talking Tamiya or Gunze I’ll only fill about the bottom third or so. THEN, get some thinner with another pipette, and fill the rest of the way.
Once you’ve added paint and thinner, stir to mix. I’ve got a Tamiya mixing stick that I love, and it’s big flat face helps me gauge when I’ve mixed enough. You kinda have to learn what a well-thinned paint looks like, but if you stir and come away with solid, uniform color coverage on the mixing stick, you need more thinner.
There’s that old adage of thinning “to the consistency of milk”. Fuck that. Personally I prefer to mix my paint to the consistency of lacquer thinner with some percentage of paint in it.
Note: Do not ask me for my thinning ratios. I don’t know. It’s like asking a mountain biker what gear they’re in. Uh…the one that feels right for the terrain and fatigue level. Same with paint – I’m familiar enough with the paints I use that I start at 2:1 and add thinner from there as needed, based on what I’m going to be doing with the paint. With things that are pre-thinned, like Mr. Paint, I’ll just add a few drops, mix, and then add a few more drops as needed. It’s not like I mix in precisely 73% thinner or anything.
B – Dial it in
The other key ingredient of airbrushing is air. How much do you need? As with thinning, I have some rough starting points and then dial it in further. Your mileage may vary based on altitude, humidity, temperature, paints etc. But for me:
- Mr. Paint – 5-10 PSI
- Tamiya and Gunze – 8-15 PSI
- Primer – 15-20 PSI
Again – shit varies within and even slightly beyond that range, but it’s a starting point.
It also helps to have a slightly higher pressure running as you load and test-spray paint. Once it’s flowing, THEN dial it in.
V – How to Airbrush
At its most basic, an airbrush is simply spraypaint that you can control. You push down on the trigger to unleash pressurized air, and that air flows past the needle, pulling paint along with it thanks to the venturi effect. Science, bitches.

However, just like driving is more than mashing the accelerator pedal, airbrushing is way more than mashing the trigger and screaming “yeehaw”.
A – A few “settings” that matter
Apart from making sure your paint is properly thinned and your air pressure is dialed in, there are a few what I’ll call “settings” that determine how well or not your airbrush does its job.
Distance – Generally, you don’t want to get to standoff distance with an airbrush. There are times where it’s useful, but this isn’t a rattlecan. If I’m working small, I may be right up against the surface. If I’m doing something broader, I may back off to three, maybe four inches. Very, very rarely more than six.
Movement – As with sharks, with airbrushes. To stop moving is to die. Hold an airbrush in place too long and you’ll get a flood of paint that will run, spider, fisheye, and so on. Keep moving, even if you’re doing tight mottling work.
Paint Flow – Just as air pressure and airflow matter, so does paint flow. If you crank back on the trigger on a double-action airbrush, you’re going to drastically increase the flow of paint, and this often ends poorly, with a big nasty sploosh on the project you’ve been slaving over.
B – Think in terms of opacity
I think airbrushing is really a lot easier to get a handle on if you know Photoshop. In Photoshop, you can dial the opacity – how transparent or not something is – for just about any element.

If you set the airbrush tool to 15% opacity, every time you go back over it will add another 15% opacity, until it gets to 100%. It’s the exact same with a real airbrush. Opacity builds up over time.
IF you try to get to 100% opacity in one go, you’re going to have a bad time. Plan to put down a layer, then move on, then come back.
C – Learn Spray Discipline
In many ways, operating a double-action airbrush is similar to driving a stick shift. Both require a certain feel, both take a bit of time to get the hang of, and once you do, both seem like second nature, like an extension of yourself.
There are two things that I have found to be really useful in developing good spray discipline and not shooting paint all over the damn place.
First, work to develop a sense for your airbrush’s engagement point. That is, the point when you can get beyond air, to where paint starts flowing. That point differs from airbrush to airbrush and paint to paint, but as with thinning ratios and PSI above, it’s one of those things that’s generally in a certain range, and once you find it, you can go back to it again and again.
Second, get comfortable playing in only the first third to half of a trigger’s range. There are times where you will find it appropriate to pull all the way back and let shit fly, but in my experience, those times are rare, even when applying primers and clear coats. Instead, you want to be metering exactly how much paint is flying at your model. To return to driving analogies again, you could drop the clutch and slam on the gas and go, but it is a poor and inelegant way to go about it.
Some airbrushes have presets build into the handle that are essentially little more than needle stops. These keep you from moving the trigger back past a certain point. Personally, I can’t stand them. To me they’re like training wheels, and frustrating when you need to take the airbrush away from your model to blow it out at full blast (even really nice lacquers can start to build on the tip if you’re spraying small).
Once you’ve got paint flowing in a nice, controlled fashion, keep the above settings in mind – so keep the airbrush moving, stay as close to the surface as your spraying dictates, and don’t try to get it all in one pass. Come back, build your paint lovingly, in layers.
And unless you’re dealing with something that needs a broad, uniform finish, like paint on a car model, or a clear gloss, don’t spray any wider or harder than you need to. Every so often I’ll see models that are hilariously masked from head to toe just to contain overspray from a band on the fuselage.
This is crazy. If you’re getting overspray more than six inches from where you’re spraying, you’re doing something wrong.
D – On Spraying and Masks
Often on a kit, it’ll be necessary to mask something – a canopy, camoflage, some area where you don’t want your paint to go, and the like.
And frequently online, you’ll run into people having problems with paint bleeding under their mask.
This shouldn’t happen, and it’s fairly easy to avoid.
We’ve already discussed going light, and building paint in layers. This is doubly true for when spraying around masks. If you don’t flood paint at the area, there’s not enough paint hitting the surface to run under anything.
To further lessen the chance, and to prevent paint “ridges” where the masks are placed, imagine a 180 degree arc over the surface. At 0 degrees, you would be spraying along the surface directly at the edge of the mask. At 180 degrees, you’d be spraying along the top of the mask out toward the surface.
Generally, you want to keep your spray angle greater than 100 degrees. This will ensure that 1) there is no air flowing at the mask edge. No airflow in that direction, no paint flow in that direction. And 2) paint won’t “ridge” up against the mask edge.
Now, there are times where this isn’t entirely possible. Consider canopy masks. If you’re trying to paint a canopy frame that’s 1mm wide, and you have masks on either side, if you go too oblique on one, you’ll be spraying air straight into another. In these cases, the key is to BACK OFF. Back off the pressure. Back off the paint flow. Build the paint up lightly and gradually.
Soft Edge Masking
Hard edge masks, such as you’d use for canopies or anti-glare panels or hard-edged camoflage, are fairly straightforward. Use tape, burnish it down.
But what about soft-edged camoflage?
Personally, unless it’s a very, very tight soft edge like seen on many tropical schemed Spitfires, I prefer to freehand. But…I have that Custom Micron and paints that support that kind of work. If you’re just starting out, or using paints that don’t really do so well at spraying small and tight, you can still use masks.
One popular method is to roll out sausages of poster putty (also called white tack). This stuff will stick just enough to your model to let you do the work. To get a soft edge, spray out over the sausages, again at that 100-plus degrees angle. The more that you spray straight down onto the masks, the harder the edge will be. One issue with this method though, is that you need to keep that angle pretty consistent, or else you’ll end up with some parts of the camo demarkations softer than others.
Another method I prefer is to trace out the camo pattern on paper – tracing paper is pretty good for this, and then cut it to shape. Once you have your pieces, trim the inside so that you effectively have a 1/4″ ribbon, and tape the inside portion down. When you spray, the untaped edge will flap slightly under the airflow, naturally creating that slightly soft edge.
Again, though, once you can, freehand is generally the cleanest and least burdensome way of tackling softer-edged camoflage.
All for Now
So…closing in on 5000 words…think it’s time to wrap it up for now. If this finds enough traction and interest, I’ll follow up with some more advanced techniques – stippling, mottling, tackling exhausts and that kind of thing.

Just a couple of corrections for you, Matt. Firstly, Tamiya’s primer is indeed available in a bottle – I have some in one of my paint drawers. It’s a 40ml bottle called Liquid Surface Primer, and looks pretty much like Mr. Surfacer 1000 (grey).
Secondly, just a minor nitpick about the word ‘opacity’ – technically, it doesn’t denote the level of transparency, but rather, the quality of not being transparent or translucent. If you can see through something, it’s transparent; if you can’t, it’s opaque (has opacity). Everything in between is translucence. Photoshop has a lot to answer for!
Thanks Kevin – I’m not 100% convinced that the LSP is the same stuff as their Fine Surface Primer in the rattlecan. I also despise the bottle design – why they can’t put primer in a regular container is beyond me.
As for opacity – that one is all Adobe’s to answer for!
Yes, please.
Advice on mottled or German style, airplane camouflage would be very helpful in the next month or two.
Thanks for this one, though. I didn’t realize you could use Mr. Leveling with Tamiya. I’ll give it a go.
Good Grief! A airbrush primer without bluster and threats to the readers IQ. All the while written in Doog-ian English (i.e. it can be understood by the reader; well, me, anyhow) . I have now a comprehensive idea of how you do your basic paint stuff. So, now I’ll be better able to understand those mysterious mistakes and have a chance to straighten them out ( after a bit o’ time I expect- sigh)
Thanks
Another great article and your “flair” with descriptive wording is just…..well, wonderful! Just imagine the 7 words you can’t say according to George Carlin.
Well put and diluted down to the core that matters!
“Fuckton”? I think you mean “fuck-ton”.
However, a very interesting read, and I look forward to the next installment.
Enjoyed the read…some points I agree with and nice to hear your views on thinning paint. I use a Pasche V40 dual action as my weapon of choice.
Great read Matt!
My airbrushing skills, whilst I’m continuing to improve with every build, fall far short of yours. Like you I’m a huge fan of Mr Paint and have found it to be game changer for me and I also advocate using different airbrushes for different roles. Next on my list will be an Iwata HP-B for detailing. Can’t quite strech to a CM as much as I’d love one!
Thanks for putting this tutorial together. Airbrushing is also my favourite part of modelling so I’d love to see a follow up explaining some advanced techniques. Keep up the great work!
Excellent and as above…more on camo wud be gr8 particularly free hand and a video would be brilliant.
Regards Howard
“When acrylic primers make sense
Never.”
Acrylics primers make all sense when you don´t want to use toxic products near your kids. Same goes for acrylics paints. Oh, yes, enamel and Tamiya-like paints are easier to use and get good results but I prefer that my kids can use the paints safely.
Thank you for the interesting post. I would greatly appreciate a tutorial on a/b cleaning – giving the amount of painting you do you should be an expert here. How deep do you go with cleaning – between colors, before a break, at the end of a session? Do you use special or just household solvents? any airbrush cleaners? A video will be especially good. For me, the thought that I will have to spend half an hour cleaning the tool every time I paint even a smallest of parts is a huge block. I tend to postpone painting, then lose interest, then have another nearly completed model sitting in a box in the closet. Your tutorial will be invaluable!
That’s the kind of summary I would have needed over 2 years ago when coming back to the Hobby. I love it, it’s a cool guide for newcomers and improvers…
Thanks for that Matt. The info on the thinning ratios and your video on black-basing are a great assistance as I try these. Would love to see something on more advanced techniques, especially salt weathering.
One of Your most informative pieces yet !!!.One quick question.You stated That you despise Alcads Black as a primer, I’m gonna be using their [Alcad] Chrome on an upcoming build. So, for best results in this instance,what do you use for the best possible outcome ? Also,I’ve had great luck with Tamiya’s Nato black thinned w/ their lacquer thinner.Whats your opinion on that ? Again, Thank You. Keith Rudzik
Alclad’s gloss black base is an enamel, and one that’s semi-notorious for just never curing. Results may vary, but it’s a common enough thing that I sure wouldn’t trust it.
In terms of a great gloss black base, I would highly, highly recommend decanting Tamiya TS-14 Black and using that. It has good bite, it’s wet-glass shiny, and if you take the time to sand and then buff it, you can get to a mirror finish.
Thanks,Doogs. How do you decant W/O making a mess & losing 1/2 of the paint ? Or, is there a device worth purchasing ? Thanks, keith R.
Get a straw, cut it to about 4″, stick one end in an empty bottle, hold the spray nozzle tight to the other end, and go to town. Be sure to let it outgas for a good while before you do anything else – the propellant makes it practically explosive!
Reblogged this on MILEPOST 15 and commented:
This is perhaps the most comprehensive piece on airbrushing you’re going to find online. It’s oriented towards armor and aircraft modeling, but most of the techniques are applicable for just about anything.
Thanks ,Doogs. So simple, I shoulda tried it myself. But I wasn’t aware of the out gassing [ do they still use propane ?]. Regardless, ,a noteworthy tip.Luckily,I don’t smoke !!! A few beers on the other hand….. As David Lee Roth once said, “You can only get so creative on iced tea “. Not that there’s anything wrong with iced tea [ gotta be P.C. online these days]. keith r.
It’s more that if you agitate it, it will literally propel itself in every direction (and will really not airbrush well) – learned the hard way with some AS-12 some years ago.
Thank you for this post. You are one of the few people that give such in depth insight.
Thanks again for the post Doog. Your blog allowed me to learn great techniques that I was able to use to make a P-51 Mustang model for my father that he said was the best father’s day gift he’d ever received. When people ask how I learned how to make models look so good I always direct them to your site. Your writing is great, funny, and clear so thank you for taking the time to write these.
I’m returning to the hobby after 40 years. I’m working on my first 2 kits, and all of a sudden I now have 5 more kits waiting in the stash. I guess I’m back into it and starting to think I need an air brush/compressor, so great article, thank you! My question is: Do people use spray booths, fans, open windows ? How careful do I have to be about inhalation and health? Thanks, love the site.
Depends on the person and the space. Extraction and ventilation are always a good idea, even with acrylics (yeah we know that inhaling lacquers and such is not good for you, but I’m not at all convinced that acrylics are harmless). I work in a garage and have ventilation for miles. In the summer months I have an AC unit behind me that’s basically always blowing any fumes away. I also, pretty much except for cleaning, paint very small, so it’s rare that I’m hurling tons of stuff into the air compared to the way I’ve seen certain others do on YouTube. But I’ll still usually toss a respirator on.
Great article. I’ve learned a lot. Tatoo ink cups are perfect, much better than plastic bottles caps I used, thank you for tip. One question: what do you think about Hataka colors? I used them, but would like to know your opinion.
I haven’t used them, but I have seen enough of others’ experiences to know they aren’t my thing.
Nice one Doogs, fuckton/fuck-ton of info
I’m another post midlife returner and was advised by the company I got my Iwata HP-B plus from that it wasn’t worth the extra cash to go for the custom micron. I appreciated them not just selling me the most expensive thing they had but would be interested in why you rate it so highly over the C plus. Cheers
The superior atomization and finer level of control really have to be experienced – I didn’t think there was any way the CM-B could live up to the hype until I found one used for cheap. That balance point where a B+ or C+ engages? That’s like the first 30% of a Custom Micron’s trigger pull. Lot more room to play in there and you can feel exactly where it’s at at every point.
Since I’m so fond of metaphors – it’s like going from a Subaru Impreza to a WRX to an STI. Or a crappy big box retailer mountain bike to a decent Trek to an ultralight alloy, double-suspension, disc braked $8,000 mountain bike. Or a decent mid-range DSLR to a higher-end full frame model. There’s a feel, a clarity, a control that’s just really hard to articulate.
Just what I wanted to hear, that’s Xmas sorted, many thanks
Great informative article Doogs.
I’ve been airbrushing for more than 40 years and I haven’t got into the acrylics, inks or other varieties on paints etc and this info is priceless. I have used the Iwata airbrushes, but I solely use Olympos airbrushes and I will be running the English version of Olympos Airbrush web site in the near future.
I use plastic Tomato sauce bottles for my paints, the one with the cap on it. I drill a very small hole in the nozzle and have my paints mixed ready to go. I have about 40 different colors in bottles…no wastage and fresh in the bottle forever.
Quick question. I am just getting back into the hobby after about 25-30 years. I have an old, crappy airbrush (a paasche “H”, I think), and want to invest in a good airbrush. Which ones of the above would you recommend as a good start for someone just coming back to the hobby? I am willing to invest in a good tool, but do not want to break the bank either. Thoughts?
Tom,there’s noHquestion Doogs will give you honest & invaluable selections.he is So experienced at air-brushing & it shows in his work.If I may, let me interject my own experience [ much like Yours ].About a decade ago I too came back to this great hobby.I was Very rusty on airbrushing & leery on dropping big $$$ on a new brush.So,having a G.F. at that time that did nails for women,I took her advice.Because hers was a fast paced business that limited her time to properly clean & maintain a quaility A.B. , she was a fan of going to the health & beauty section of e-bay & cheaping out on ,basically disposable’s.18.99$ will get you a dbl.action gravity feed ,crome plated brass unit [ often w/ differant nozzle & needle sizes ].They also have suction feeds, single action, etc. ,all at super cheap prices.The beauty is, They work just fine.They probably won’t give 20 years of service [ 1 year,more likely ] & you can’t get replacement parts.Worst of all, They are most likely made in China. But I’m only throwing it out there just to get you back up to Doogs point. Best wishes, SgtRudz.
Hi Tom
If you buy cheap you get cheap…Olympos is one of the best airbrushes and they are now very affordable because they don’t come in a fancy packaging case. There are many different Olympos airbrushes, I would suggest any .02 or .03…but there are many different cup configurations, you need to check out the actual airbrushes to see which one suits your needs. There is also a HP-8 which is compact and has a movable cup for all angles of airbrushing.
Here is a link to the Japan Olympos Airbrush site, http://olympos-airbrush.ocnk.net/
Nice update, so handy having all the references and details on one place and one most. Most appreciated
Cheers
One post ( or most doh)
If you had to choose just two of your brushes, would they be the Micron and the HP-C Plus? While the Micron is amazing, and amazingly expensive, would a HP-B Plus do in a pinch for those of us who want to save a buck and still have relatively precise, thin lines and control (yes, I saw the review of the GSI PS-770)? I know you can swap needles/nozzles between the HP-C and -B, but the smaller cup on the -B is a nice thing and I imagine the -B might still perform a bit better, yes?
Thanks for the advice! I’ve just bought a bottle of Mr Hobby MS1500 black primer on your recommendation. Do you airbrush straight from the bottle or thin? If so, what ratio and thinner type do you use (Mr. Self-Levelling thinner?).
Thin it – I usually go about 60/40 MLT to MS1500
Great article Doog! Need your advice. I have been using my H&S Infinity 0.2 mm for 1.5 years now. I spray about 2-3 times every week and I thought by now I would have already gotten used to the feel. However I still find myself sometimes struggling to find that engagement / biting point to get a thin line. Problem is this engagement point is so close to the starting point; like maybe 2-3mm trigger movement. It’s so sensitive that a slight movement with release more paint, too little and I will have no paint! The Infinity can produce the fine line(no doubts about it) but just too sensitive for me. My tamiya paints are usually thinner 60% with X20A. I think I need an airbrush that’s maybe in the same league as my Infinity but more trigger play and less sensitive. Base on your experience what do you recommend? I have been eyeing the Mr Hobby PS770 & I have seen your video on it. Wil I find my true love in this airbrush?
I had an Infinity for a brief time and ended up selling it – to me the PS-770 is a far better painting partner. Iwata – and by extension the Gunze airbrushes – have a far more tactile trigger feel than H&S. The paint flow also seems far more linear in how it builds, versus the nothing, nothing, sploosh that other brushes can exhibit.
I don’t know if you still check comments on older posts. Hopefully someone can help me out. I really found your website helpful and informative. You sold me on the GSI PS-770, ordering one today. I want to make sure I’m shooting decent paint though (I am still new-ish to airbrushing). With the kind of detail the 770 can do and after watching your review of it I think the Mr Paint line looks right, but when I search amazon for Mr Paint I get results for Mr Color. Are these the same?
Nope, they’re different. MRP is out of Europe – Mr Color and Mr Hobby are brands of Gunze. I get my MRP from Hobbyworld USA and Sprue Brothers.