

Not too long ago, I had a thought. And that thought quickly turned into an effort.
Contributor-funded, contributor-selected kit reviews.
How’s it work? Simple. Contributors donate into the Review Fund and select the kits to be reviewed. Then I review them, with an exhaustive focus on how – and how well – they build.
These are full, naked builds. No aftermarket. No filler. No paint. Nothing for the plastic to hide behind.
Want to know more? Check out the Reviews page, FAQ and Manifesto!
The first kit selected? Fly’s 1/32 Hawker Hurricane Mk.IIc.

While this review is primarily video-based, I figured it deserves a home here on the blog, as well. A single point to link back to, considering the review is spread across several videos.
Read on to get a sense of what I made of the kit, and be sure to check out the videos for a truly in-depth look.
Part I: Introduction
The first video in the series lays the groundwork for what’s to come, and provides a quick tour of what Fly provides in the box.
The real standout of this kit is the stunning level of surface detail on the wings, and to a lesser extent the fuselage.
The acetate gauges for the instrument panel are appreciated, the resin cannons and tires are nicely rendered, and the marking options are a good deal more interesting than the “usual” RAF schemes.
The Hurricane also has plenty of “limited run” hallmarks. Relatively thick plastic. Lots of seams and microflash to clean up. Very little in the way of alignment aids. Soft detail on many of the smaller parts.
Part II: Cockpit
The second video marks the real start of the build review, beginning with the opening stages of the cockpit.
Here, the limited run-esque nature of the Fly kit becomes immediately apparent, with soft detail and a lack of alignment aids on major cockpit parts.
My biggest gripe at this stage, aside from annoyances with the instructions, is the decision to render the control yoke in plastic rather than resin. It’s a focal point in the cockpit, and could certainly benefit from the upgraded detail that’s possible with resin casting.

Part III: Cockpit, Again
Cockpit work carries into Part III, with the rest of the tube frame being built out. Many of the annoyances from Part II persist and even build in Part III. Fit remains vague, detail soft. The instructions go from frustration to outright betrayal as steps require you to violate the laws of space-time to follow them in order.

If I had to give one piece of advice to anyone taking on this kit, it would be this: DO NOT TRUST THE INSTRUCTIONS OR THEY WILL FUCK YOU.
Part IV: Instrument Panel
Before diving into the fuselage, it’s worth taking a brief interlude to tackle the photo-etch and acetate instrument panel.
The acetate gauges are certainly appreciated, and the PE panel bits are at least tolerable, though I’d have preferred something with more relief to it. I would also have preferred that the instructions accurately reflect the panel we’re dealing with – it would make placement of different PE detail parts a lot easier.
Part V: Fuselage
It’s time to get the fuselage together!
In this portion, the cockpit proves a challenge to fit between the two “shelves” on the sidewalls – likely a combination of kit vagueness and user error.
The instrument panel, to, proves frustrating, with no backing plastic. Basically, you get to fix it in place along the razor’s edge of the PE.

Fortunately, the main fuselage halves do go together quite well.
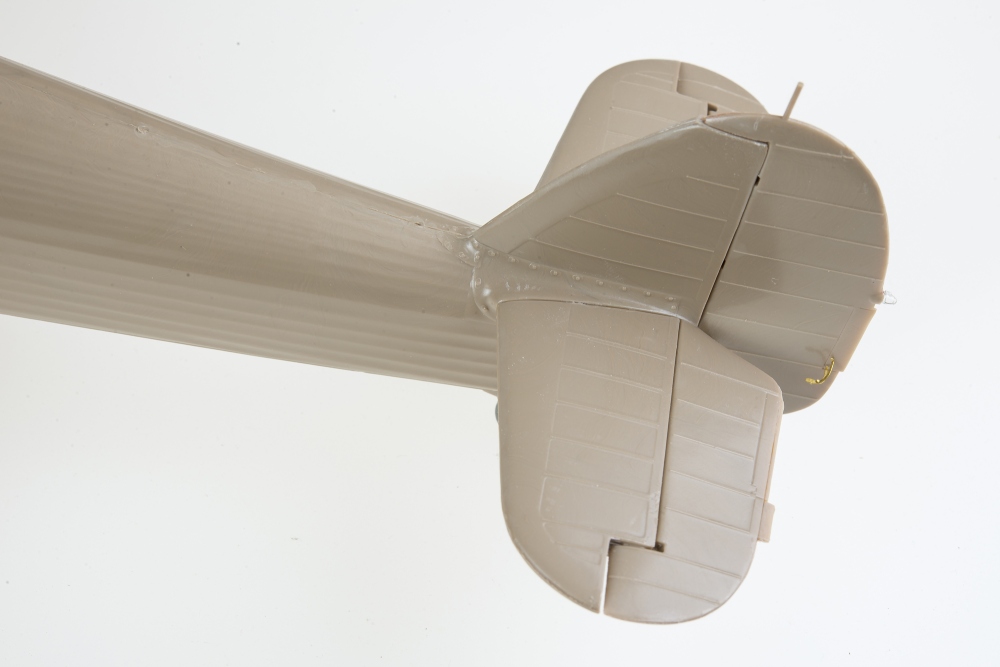
Part VI: Wings
The wings of the Hurricane are a tricky affair, with five parts that need to come together.
Installing alignment aids proves a big help in getting things to go together, but some cleanup and shaving is definitely necessary, and even then, the top wingroot cleanup doesn’t look fun at all.


Part VII: Wrapping Up
There are plenty of finishing bits to the Hurricane, and they vary from sloppy (antenna mast) to annoying (the mounting collar on the prop spinner) to rather pleasant (the fit of the cannons and tires).

Part VIII: Final Thoughts
Ultimately, would I recommend the Hurricane?
Well, I think that depends on two things.
The first is whether or not the Hurricane, as a subject, blows your skirt up.
And the second is the kind of modeler you are – or rather, where your preferences happen to fall.
Does your favorite part of modeling come before you lay down primer, or after?
If you lean more toward the pre-primer parts, get a kick out of scratchbuilding and bringing kits to heel, you may love the shit out of the Hurricane.
But…if you lean more toward painting and markings and weathering…if the build is more of a means to that end for you, well, you may want to pass on this one.
For me, personally, I know that my preferences lie more toward the latter.
And so for me (again, personally), this kit is a nope.


Thanks for doing this! I gotta say though, watching those videos the same thought kept going through my mind: “well, better him than me.” I enjoy the building phase of kits, but only if I feel like the kit is working with me and not actively resisting progress at every turn. There’s a difference between something that’s tough to build because it’s a complicated structure, and something that’s tough to build because the kit manufacturer just couldn’t be bothered to try harder. And sorry, “it’s a short run kit” doesn’t work for me. It’s injection molding, not rocket science, folks.
Hey bud. How old is the kit ? Any other kits in same 1/32 scale I’d like to find an older kit I like all older kits for some reason ! Lol. But my eyesight has gotten worse over the years many older kit in my stash to do but no hawker hurricanes but love the plane. And all aircraft from that area and time ! Friend and foe ! Tks
It came out about a month or so ago
Bravo Doogs on both the subject matter and the quality of your video production. Your acerbic commentary is also very entertaining.
Continuing our discussion from over on LSP, I think a lot rests on how much investment you have in the subject. So for instance, if you wanted a fast easy build to get painting or applying decals to, this probably isn’t the best choice of kit.
But if you like the subject – or the kit somehow just grabs you – it’ll reward you. Like to sculptor with a cube of marble, you just have to chip away everything that isn’t Hurricane shaped…. or add it as required.
I don’t think we can forget it’s a short-run kit – and speaking as someone who recalls the start of SRKs with makers like VeeDay and Pegasus – by comparison, it’s like a Tamiya superkit. Hell, even a Starfix would be. Those early short runs were crude to the point of it not being clear where part began and runner and/or flash ended.
Fly have improved from that crudity immensely but it still isn’t a Tamiya, and still requires some respect and understanding and also some prior knowledge of the subject is helpful, if not mandatory.
Taking as but one small example, that carb. intake.
I can see how you followed what the instructions appear to show. But in reality, the carb. intake mouth should be hollow (so a boring out job that Fly neglected to mention – thank gawd we now have motor tools with spherical bits, so we can also bore out the top to create a representation of the duct) with the
mesh part and its surround installed standing proud of the opening on those bend-down arms to represent the ice guard. I couldn’t find a suitable Hurricane photo, but this Mosquito illustrates my point nicely.
Another example would be ensuring the exhaust manifolds are parallel when viewed from above, something the forward fuselage taper won’t assist you with. Again not mentioned in the instructions, but something else provided by some background research that the average modeller may not be aware of.
And thanks for the tip about the instructions – I’ll be sure to copy the parts layout diagram. And it’s informative to see what a talented modeller can make of the kit, though I realise it’s nothing like your best work.
Oh – and in response to the commenter who said injection moulding isn’t rocket science?
No it isn’t – in theory. But precise IM might just be as expensive, pound for pound. The fact that IM products are common shouldn’t allow us to easily dismiss the time, skill and investment precision moulding demands.
Now, what I really want to know Doogs is how you got that Italeri Starfighter to look as good as that.
all the best
chek
p.s Can you replace that final still photo Doogs?
The lens distortion of the wingtip had me thinking it was a Tornado (the 1940s Hawker one between the Hurricane and the Typhoon) before the chin intake was added.
Thank you for the review, Doogs. Brutal but honest.
I am myself midway through the building of the kit. I agree with all your observations and also your closing thoughts. Still I think this is a very good kit once you get past the few annoying quirks. Like they say, no pain no gain.
I think HpH did the Hurricane wings, before abandoning that project & passing the moulds onto Fly? That would explain the exquisite detail & the marked difference between the wings & the rest of the kit.
Interesting and that would make a TON of sense.
Hi there – I’m currently building the Hurricane and loved your build review. I too encountered all (and more) of the problems you did – that lump of resin for the landing gear housing was a real pain in the arse to fit! Your commentary certainly made me smile and gave me the motivation to continue otherwise I would have binned the bloody thing a long time ago! FYI, I managed to find an aftermarket resin control stick and seat which made a real difference to the cockpit….
Hopefully I will finish the damn thing soon as it has now become a bit of a drag on my patience and eyesight but I have to say that it is looking good with some paint and decals to hide the flaws!
Thanks again for all your help, much appreciated!!
Peter, London, UK
I’ve just finished the Mk I for a magazine build article for (eventually) Scale Aviation Modeller International. I found pretty much what you found, although I love the way you put it – “you have to violate the space-time continuum to build the cockpit.” Personally I gave up on the kit cockpit and used an aftermarket intended for the Revell kits: a bit of work, but more positive fit in the end.