

Part I | Part II| Part III | Part IV
Welcome to Part IV of the MiG-21F-13 build. At the end of Part III, the Fishbed was painted, chipped, and had just had the markings masked and sprayed.

Now, it’s time to continue the journey with some weathering.
Wash & Strut
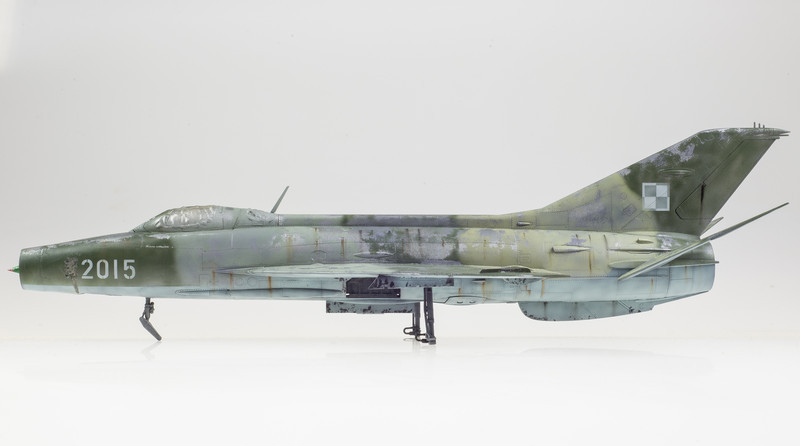
Handling the MiG-21 with the nose strut only installed was becoming tiresome by this point, so I said f- it and installed the main gear struts as well. The fit of these into their mounts is frustratingly wobbly, but somehow my “CA-and-pray” approach worked just fine ,and the plane appears to sit level. Now…it does appear to sit taller in the rump than most images I’ve seen…but I think that’s a case of the oleos being at full extension or something.
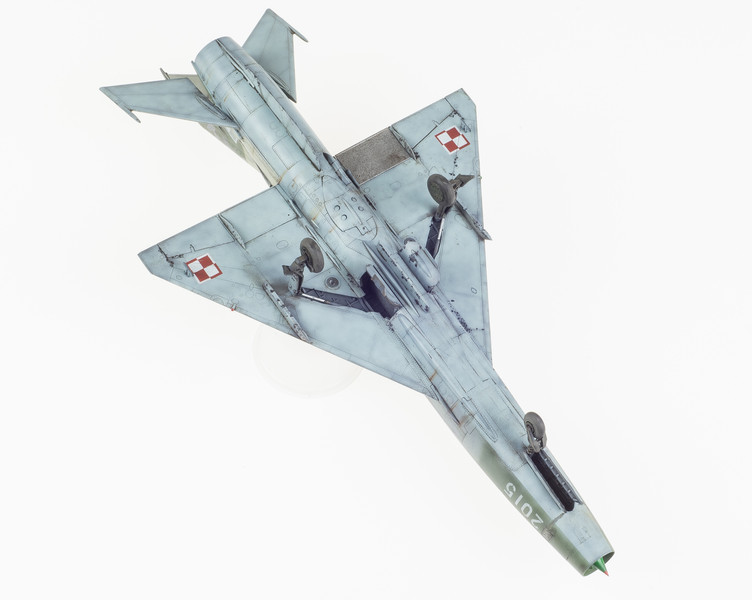
In addition to strutting the MiG, I also applied Vallejo Light Gray Wash. Vallejo’s washes are something I’ve recently discovered, and used properly they are fantastic. The darker colors really have a much stronger effect, but the gray wash quite subtle and helps to bring some cohesion to a really visually disparate paint scheme like this one.

Like I said. Subtle.
Streaking
Derelict aircraft – and Soviet/Warsaw Pact derelicts in particular – seem given to streaking. Some water will get into some crevice, and some bit of grease will run down something. Or corrosion will take hold. Or dirt. Whatever. The result is usually very pronounced streaks from many locations across the fuselage.
I’ve tried using the enamel streaking products, but keep coming back to good old oils. Just dab a tiny amount with a toothpick or airbrush needle, then sweep down over it with a wide, flat brush. Instant streaking! Maybe go back with some odorless thinner to smooth things out or get a bit more subtle…
Panel Lines
After giving the oil streaks a few days to cure, I went to town with my trusty bottle of Flory Dark Dirt wash. It’s clay based, so it can be slathered on, then wiped away with a damp paper towel, leaving nicely defined panel lines.


Finishing Touches
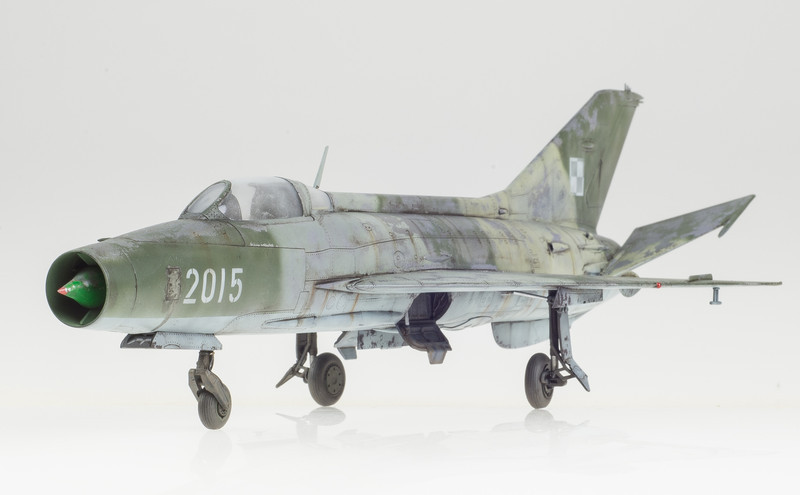
Once the wash was removed – along with the paper towel fibers it entailed – the MiG-21 received a coat of Vallejo Matt Varnish, then the canopy mask was removed, and the landing gear installed.
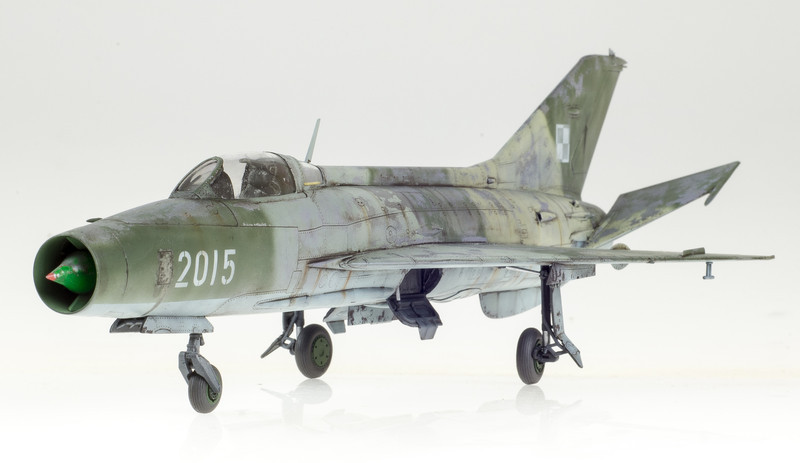
Next game the joy of adding brake lines to the nosegear. For this I used some micro-sized black tubing and a bit of lead foil.


The formation lights on the leading edges of the wings were painted with Model Master Chrome Silver, then gone over with Tamiya Clear Green and Clear Red.
Lastly, the canopy was misted with some AK Interactive Dust Effects…since no derelict’s canopy is sparkling clean and shiny.

Done!
After 74 days on the bench, here is the finished MiG-21F-13. I will probably be putting together some sort of base for it, but I’m not sure yet whether I want to go dedicated, or focus on a display that can be used with multiple Russian aircraft in the future.


How do you cure your models after painting or weathering?
Reading this over, and this is great inspiration for my build of the Revell Mig-21 that I will be doing in the future as part of an office competition. Keep up the outstanding work!
beautifully done, imm pl\anning a camouflaged polish one too, but mine will be slightly fresher 😀 😀 😀