
When I asked for feedback about ways to make the blog better, one of the items that jumped out at me was combining build reports into a single post, so the entire build could be perused from first steps to final details.
This is a test of that concept, using Build Report posts from the Spitfire VIII. Let me know what you think! If this works out, I may be transitioning all future builds to this format, with breakout posts for special modifications and whatnot.
And yes…I realize some of the formatting is a bit weird. Sorry about that, but this is just a test, so who cares, right?

The Spitfire Mk.VIII was a victim of timing.
In September 1941, the Luftwaffe’s new fighter, the Fw 190, made its operational debut, and quickly outclassed the RAF’s Spitfire Mk.V. That same month, a potential answer, the upgraded Rolls-Royce Merlin 61 engine, made its first flight. The engine was a stunner, and work began at once redesigning the airframe to accomodate the larger, heavier 61.
The new design, designated the Mk.VIII, was intended to be the RAF’s answer to the formidable Fw 190.
This is where the timing thing comes in. In July 1942, while the Mk.VIII was still in development, the Spitfire Mk.IX debuted. Intended as a stopgap until the Mk.VIII arrived, the Mk.IX combined a Mk.V airframe with the new Merlin 60/70 series of engines destined for the VIII. It outperformed everyone’s expectations, and soon assumed a place as Britain’s front-line fighter.
By the time the Mk.VIII entered service in June 1943, it was relegated to the Mediterranean and the Far East, where it served with the RAF, RAAF, and even equipped USAAF fighter squadrons in Italy until it was replaced throughout 1944 by the P-51 Mustang.
For this rather epic – I can’t think of any other word to describe Tamiya’s effort with this masterful kit – build, I’m planning to go with the markings of one of those USAAF Spitfires – “Fargo Express”, flown by Captain Leland Molland of the 308th Fighter Squadron, 31st Fighter Group, 15th Air Force.

Between the tropical camoflage, American markings, and yellow theater bands, it should be a pretty interesting scheme when all is said and done.
Stay tuned. This one’s going to be a ride!
PART 1: Cockpit and Main Assembly
Is it possible to be a modeling adrenaline junkie?
It seems that, after coming back to the hobby last year, I’ve been hurling myself at challenge after challenge, barreling right into situations that used to intimidate the bejesus out of me. In the last six months alone, I’ve tackled my first open-turret armor, my first winter whitewash, and my first biplane, complete with woodgrain and rigging.
Now, I’m tackling my first over-$100 kit, and one that many one call one of the best, if not the best, kits ever stuffed into a box.
So let’s get on with it!

The Cockpit
The Spitfire’s cockpit is a pretty epic build in and of itself. I’m pretty sure it alone contains more parts than the whole of the 1/48 Mustang that’s sharing the bench. I mean, the control column assembly is four pieces by itself! Add Eduard’s fabulous photo-etch interior set and a Barracudacast resin seat to the mix, and the cockpit becomes an extended build in its own right.
After filing down the surfaces that needed filing to accomodate various PE elements, I primed all the parts with Tamiya AS-12 bare-metal silver, then airbrushed the proper areas with Model Master RAF Interior Green. Next the PE started to go on (easy enough at this size, but complicated by Eduard’s annoying self-adhesive concept…backing paper and adhesives make removing parts from the fret rather frustrating). The instrument panel is, hands down, the nicest I’ve ever seen in PE.

While I was at it, I painted the Barracudacast resin seat in a rusty brown combination of Tamiya paints to represent the unpainted Bakelite material the Spitfire seats were made of (I realize it wasn’t Bakelite, but a similar resin formulation, but Bakelite sounds better). The leather padding is a matter of some controversy. I’ve seen it both in natural leather brown, and in black. I opted for black to provide some visual contrast.
Next, details were painted, seatbelts added, and everything weathered with a combination of drybrushing (Floquil Old Silver) and oil washing (Raw Umber thinned with Mona Lisa Odorless Spirits). The major subsections of the cockpit fit together amazingly well, stacking into the “floor” before being sandwiched in place by the sidewall detail.

One thing I love about Tamiya kits is how they can often as not hold themselves together. With, say, Eduard, everything has to be glued down. But with Tamiya, you can add up multiple subassemblies, dry-fit them, and have them stay in place. Love it.
Once everything was locked down and the shoulder belts of the sutton harness added, the cockpit was done.


Aiframe Assembly
Once it came time to sandwich the cockpit assembly within the fuselage, I discovered my first and so far only area of disappointment with the kit – the lights. Here’s how it works. Tamiya leaves an indention about 1/4″ in diameter, which you must drill through to make a hole. You then mount the lens from the inside, and the glass from the outside. What sucks here? First, the light on the underside of the fuselage lies directly on the join line, making it difficult to get a clean hole. But…at that kind of size, you’re also moving up into big, coarse drill bits that don’t leave perfect, smooth holes in plastic.
But more frustrating than that…why not just leave an opening there to begin with? Navigation lights were a universal thing, and if they had for some reason to be filled, well, Tamiya includes plenty of other holes in the wings with pieces designed to drop right into place with surgical precision. So why not just do that? Drilling holes that large just seems unnecessary.
Apart from the light holes, the Spit builds up beautifully. The control surfaces are all workable, moving thanks to metal shafts with PE hinges sandwiched between the elevator/rudder/aileron halves. They are a bit too flappy for my taste, and I will probably just glue them into one solid position, but it’s a great approach.
The wings are works of art, and the fit of various panels (that you can and should glue into place from the inside while you can) is the best I’ve ever seen on any kit, ever. Drop them in, tack them with some solvent from the inside, and you’d have no idea they were separate parts.
The wing links up with the fuselage rather well, too, and leaves you enough room both front and back to tack critical portions of the wing root/fuselage join from, once again, the interior of the kit, reducing mess and thus cleanup.
There’s still a ways to go on the build-up, but this is such an epic kit, I figured I’d best jump in here, with the major airframe components in place, rather than try to incorporate the rest of the build-up phase into a ridiculously massive post.


Impressions Thus Far
Yes, this kit is expensive.
It is also, hands down, the single most impressive kit I have ever touched. Everything about it exudes passion, from the detail accuracy to the crazy-clever engineering to the impeccable fit.
At this point, I’m having an absolute blast with this build. And if you can look past the price, I strongly recommend picking this or one of the other Tamiya Spits up. In my opinion, they earn every penny.
PART 2: The Merlin
One thing most nations discovered during the course of World War II was that engines mattered. A lot. In fighter aircraft especially, the choice of engine could decide whether a new airframe turned into a war-winner, or got relegated to secondary theaters and lesser allies.
The Spitfire never had to worry about that. It started the war with perhaps the most famous piston engine of all time – the Rolls-Royce Merlin. While versions of the Merlin would eventually find their way into everything from the Avro Lancaster bomber to the American P-51 Mustang, it’s proper home was and always will be beneath the cowl of a Spitfire.
Building Up the Merlin
The extremely detailed Merlin engine Tamiya provides with their Spitfire VIII spans over two entire sprues, with additional bits scattered across the rest of the kit. Overall, it makes for a built that’s complicated in process, but straightforward in execution. Save for the exhaust stacks, whose mounting stubs could have been better designed and went in with an Eduard-like “god I hope I get these aligned right” feeling.
But I’m getting ahead of myself. Initial buildup went fast, even with the Barracudacast rocker covers (purchased for the embossed Rolls-Royce logo). I started to use Eduard’s PE set on the engine, but found it needlessly fussy and not to my liking, so apart from a bit here and a piece there, it sits unused.

Once initial buildup of the engine, carburetor and supercharger were complete, I painted them all semi-gloss black using a mix of Tamiya X-1 and XF-1 blacks. I got the red lettering of the Rolls-Royce logo by painting the area red first, masking, then drybrushing on top with Model Master Semi-Gloss Black enamel.
Initial test-fitting with the engine mounts proved a very perfect fit.

While I prepped and painted the firewall, frame, and other attachments RAF Interior Green, I did a bit of detailing on the engine. Next time around, I’d probably forgo this step, since the wiring is all but invisible once the outer frame and exhaust stacks go on.

Slowly but surely, everything came together. The bare metal bits were painted with Tamiya AS-12 Bare Metal Silver, then Alclad Aluminum. The exhausts were painted with a 50/50 mix of Alclad Steel and Exhaust Manifold. Everything got a raw umber oil wash, followed by some selective pigments…mostly Black Smoke, Africa Earth, Europe Dust, Russian Earth, and Burnt Steel Blue, all by MIG.
Here’s the end result…

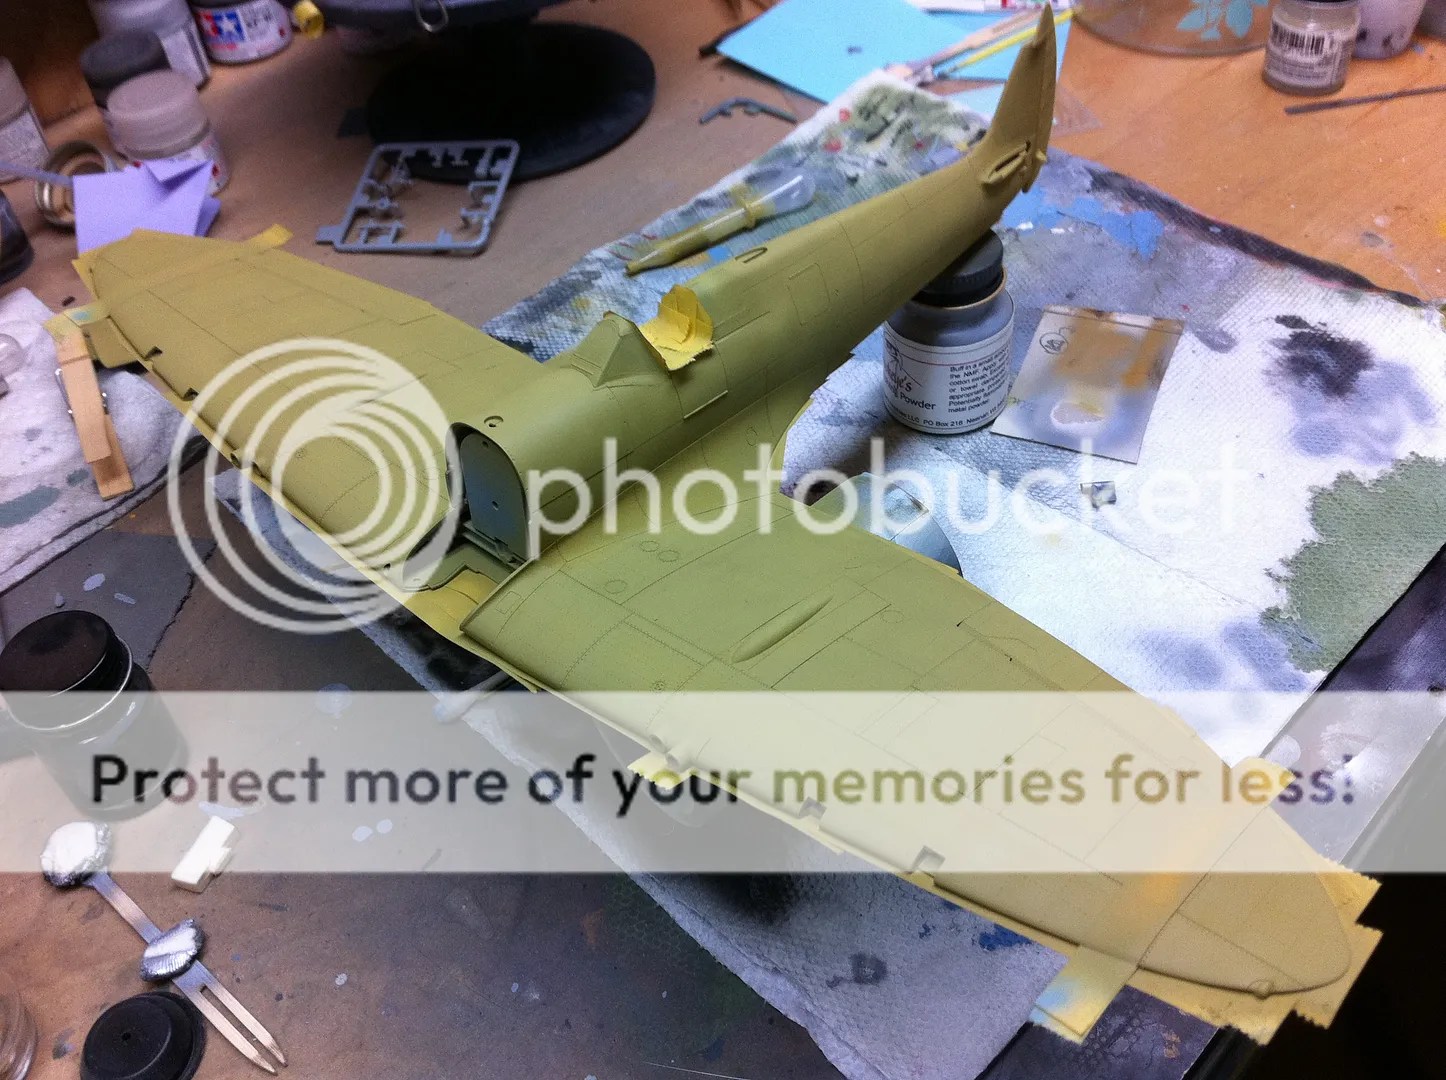
Regarding the rest of the aircraft…it’s been primed. The wings and prop tips just got their coat of yellow tonight (MM Deep Yellow), and the gun fairings and propeller cap got shot up in Model Master Insignia Red. A few more details to see to, and then it’s hardcore into the painting. Stay tuned!
PART 3: Paint
It feels like it’s been a long time coming, but the big Spitfire Mk.VIII is finally going under the airbrush.
Stupid Hot
Building kits in the garage, in Texas, during the height of summer introduces some serious environmental challenges. Obviously the heat, and the fact that even the slight effort of masking a wing or sanding Panzer wheels can leave you dripping with sweat in under ten minutes. Beyond the discomfort, however, the heat also messes with paint. Specifically, I’ve been having ridiculous problems with paints “dusting” as they come out of the airbrush, forming nasty, rough patches on the model. It happened with my Sopwith Pup. It happened with the Krylon gloss black I tried to use on the Mustang. And it’s been happening with everything I’ve thrown at the Spitfire. My solution so far has been a bit of a two-parter.
First, I’ve switched the main colors up to enamels. They tend to be more forgiving in application and less prone to dusting in general.
Second, I’ve been polishing with Micro Mesh polishing cloths. These do a great job of knocking down rough spots, but I have yet to try them on enamel paint and am a bit worried. In the past, attempts to sand enamels have left a lighter, chalky residue. Hopefully by dry and not wet sanding I can avoid this or leave it easily removable. We’ll see!
Priming
I kicked things off by priming the Spitfire with Gunze-Sangyo Mr. Surfacer 1200 sprayed through my Harder & Steenbeck Evolution. In some areas, it went down perfectly smooth. In others, it dusted pretty badly. Micro Mesh to the rescue!

Azure Blue
After the primer, I sprayed the wing stripes with Model Master Deep Yellow (Insignia Yellow seems far too “lemon yellow” in my opinion), then masked them off with two strips of tape cut to match the width of the Tamiya decals.
When I was ready to paint the underside, I pulled out my Guzne Mr. Color Azure Blue and found it to be far more lavender/violet than any Azure Blue I’ve ever seen. So I picked up a bottle of Model Master RAF Azure Blue instead.

I sprayed this on using the “three-layer blend” technique, rather than dealing with tedious and difficult-to-control preshading.
First coat, straight-up Azure Blue:

Second coat, Azure Blue lightened with Flat White, sprayed in the panel centers while avoiding lines and rivets:

Third coat, highly-thinned Azure Blue (1:4 paint to thinner ratio), sprayed in successive coats until the desired effect was achieved:

Middle Stone
After giving the Azure Blue a few days to cure, I masked off the underside with a combination of Tamiya tape and post-it notes, and moved on to the upper surfaces.
The first color to go on – RAF Middle Stone. Again, I used the three-layer blend to add depth and character to the finish.


Dark Earth
Once the Middle Stone had a few days to cure, I started the tedious task of masking the wings and fuselage to apply the Spitfire’s distinctive disruption camoflage. Unlike most Spitfires, which sported hard-edged camoflage, Molland’s “Fargo Express” shows tight, hand-sprayed lines, indicating it probably got repainted along the way. Typically for soft-edged camoflage, I’ll use white tack poster putty or silly putty, but this particular aircraft also has large Middle Stone “blanks” where the RAF roundels were overpainted. Try masking those with silly putty.
After some initial attempts, I gave up and freehanded the basic patterns.

Then I came back through with tracing paper and some discs cut to the size of the RAF roundels, used these to mask, and sprayed in the three layer blend. The result? A not-quite-but-almost hard edge, exactly what I was going for. When I pulled all the masking off, I was pretty floored at how it seems to be coming along!


Coming up next, decals and details…stay tuned!
PART 4: Decals and Details
With the Spitfire painted, things have been coming together rather quickly.
There are a ton of small parts to contend with in this kit, but by this point in the process, they’ve mostly been attached somewhere. But after paint, I added several more that had been waiting their turn. The fuel gap, .303 machine gun fairings, and tailwheel all went on at this point. I also attached the set of turned-brass Master Hispano 20mm cannons I picked up for the build. They’re a bit spendy, and honestly they don’t stand out the way metal barrels on a P-47 do, but they’re still very prominent.
With the various fiddly bits installed, I hit the Spitfire with a coat of Alclad II Aqua Klear Gloss, which sprayed like crap and which I had to wet sand back to non-crappiness. Frustrated at my ongoing lack of finding a clear gloss that I don’t hate, I pulled out a rattlecan of Tamiya clear and glossed it up the old fashioned way.
The Decals
Tamiya’s decals have a reputation for being rather thick and reluctant to melt down into the surface detail. Sadly…this is also true of their big, pricey 1/32 kits.
So I snagged Barracudacals’ excellent Mk.VIII decal sheet.
I’ve only used Barracudacals’ stuff once before – on my Mosquito NF.II – and came away rather impressed. Their Spitfire decals are of the same quality – very thin, pretty strong, absolutely no silvering. My only complaint is that, good god, unless you land the insignia decals dead-frigging-exactly where you want them to go, get ready to do battle as you try to slide those suckers where they need to go.
The stencils are mostly Tamiya, which sucks. Especially as I realized WHEN I WAS DONE that the Barracudacals sheet included about 80% of the stencils that I used.
Still – Leland Molland’s Spitfire is pretty sparse on the markings – but what’s there does look pretty slick.

Wash
Once the decals were on and sealed with a second mist of Tamiya rattlecan gloss, I hit the entire plane with a sludge of ProModeler/Flory Dark Dirt Wash. This was then mostly removed using damp paper towels (wiped in circular motions thanks to a forum tip!), leaving behind some nice and dark (but not too dark) panel lines and the impression of some very hard living.


Matte
Despite my problems with the Alclad Aqua Klear, I went back to Alclad to dull everything down, with a light coat of their Matte Klear Kote. Unlike the acrylic aqua, this stuff is mineral-spirit based, and goes on amazingly, stunningly well. Easily the best flat coat I’ve ever sprayed through an airbrush. The matte is also a great finish. Almost flat, but not quite.
The prop spinner was sprayed with the slightly glossier Light Sheen Klear Kote.
As this dried, I prepared and attached the landing gear (which goes in with screws and magnets!), removed the masking from the clear parts, and began some of the weathering work (a bit of silver chipping here and there, mainly).
There’s still some work to be done – staining mostly. But the big Spit is definitely most of the way there!
Stay tuned.


